


Audition Some Autumn Bloomers
Extend the beauty of your garden with vivid autumn-blooming perennials. When you think of fall-blooming plants, don’t stop at mums – there are many perennials that can add color to your yard at this time of year.
Top Autumn Bloomers
While there are different autumn-blooming perennials for different growing zones and climate conditions, some of the most popular and widespread options include…
- Fall Daisies
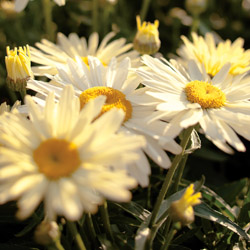
For fall daisies (besides daisy mums!) grow Boltonia or Nippon Daisy. Boltonia is a tall (3-4′) grower, suitable as a background plant. White or pink daisies are borne in profusion atop fine grey-green foliage. The Nippon Daisy (Chrysanthemum nipponicum) is covered with large crisp white daisies in October. Both love lots of sun and make excellent cut flowers. - Autumn Sedums
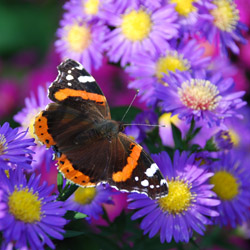
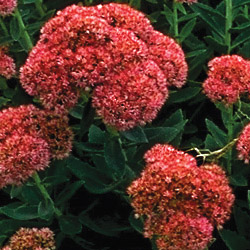
Bold-foliaged sedums provide texture as well as color in a sunny place. Sedum ‘Autumn Joy’ is the most well known. It has coppery-pink flower heads. Sedums ‘Brilliant’ and ‘Stardust’, with soft pink and white flowers respectively, are also attractive. For a totally different color combination plant sedum ‘Vera Jameson’. It has gray-purple foliage with rose pink blooms and looks stunning when planted with Blue Fescue, Artemesia Silver Mound and other silver-foliaged plants. As an added bonus, all the sedums are attractive to butterflies. - Autumn Asters
Asters are another fall bloomer that butterflies love. These perennials like sun and moist, well-drained soil. There are many colorful aster varieties in shades of pink, purple, blue and white. Some favorites include tall-growing aster ‘Alma Potschke’ with bright pink flowers, blue-flowered aster ‘Professor Kippenburg’ and low-growing aster ‘Purple Dome’ with its deep purple blooms. - Autumn Goldenrod
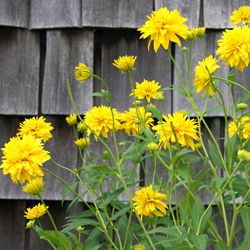
Sunny yellow goldenrod (Solidago) is another bright addition to the fall garden. Wrongly blamed as the cause of fall allergy problems, goldenrod has rightly taken its place in the fall garden. It looks particularly effective combined with blue flowering plumbago, purple asters and ornamental grasses.
Fall Bloomers for Shade Gardens
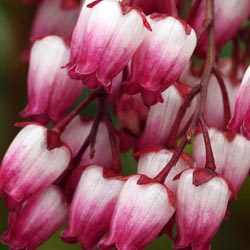
Even shade gardeners can enjoy late blooming perennials. Tall growing Japanese Anemones are a stately addition to the perennial garden. Bloom colors range from pure white to various shades of pink, and flowers can be single, semi-double or double blooms. Anemones grow well in light to moderate shade and spread quickly to form large clumps, filling in space vacated by spent summer plants. Turtlehead (Chelone) is another fast spreader for shade. Rose pink flowers cover the tops of the plant from early September to October. For a deeply shaded location, try Toad Lily (Tricyrtis), which has clusters of beautiful cream flowers, spotted with maroon along its upright stems. For light shade, plant Blue Cardinal Flower (Lobelia siphilitica), whose intense blue spikes can be admired from mid-August until frost.
No matter what type of garden you have, the end of summer does not need to mean the end of colorful blooms. Instead, just opt for amazing fall bloomers and enjoy brilliant color even longer!
Summer Watering Tips
As the days heat up, watering can become a dreaded garden chore and too many gardeners use wasteful techniques that use plenty of water but don’t give their plants the moisture they really need. Make watering plants easier and more efficient with the proper practices and tools…
- Mulches not only make plantings look more attractive, but their most important functions are to help retain soil moisture and minimize weeds, which would also usurp moisture from your plants. Mulch around plants to a depth of 2-4 inches, refreshing mulch as needed to maintain that depth and attractiveness.
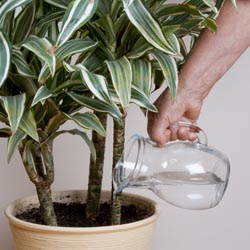
- Watering cans and small containers work great for spot watering plants with different watering needs by hand. You don’t always need to get out a hose or sprinkler to get the watering done.
- Check to make sure that you have the proper length hose(s) to reach every corner of your garden. Take into account any obstacles in the way, and be sure you aren’t dragging the hose over any delicate plantings to reach more distant dry spots.
- Add a water wand to the hose to get the water where it’s most needed – the base of the plants – without needing to bend over repeatedly, which can cause back strain.
- The best time to water is during the early morning hours of a sunny day. This will allow plants to absorb more water before it evaporates when temperatures rise, but won’t leave water to sit on plants overnight when mold can develop.
- Always water plants and container gardens thoroughly and deeply to encourage deeper, more drought-tolerant root systems. It is better to water less frequently but more deeply rather than more often but with less water.
- In the landscape, a good rule of thumb is to provide an inch of water per week minimum. Keep track of precipitation with a rain gauge to avoid wasting water by overwatering when Mother Nature does the job.
- New individual plants that are set out, direct sown seed beds, sodding, etc. often require daily care, including watering, until established. Check moisture levels carefully during this period so the plants are well cared for.
- Use soaker hoses to provide slow drip watering. This allows plants to absorb water easily without wasting water by evaporating from foliage or spraying into the air. Soaker hoses can even be layered beneath mulch to preserve as much moisture as possible.
- Pay extra attention to plants in containers and hanging baskets as they tend to dry out faster and with greater frequency. These plantings will likely need to be watered daily or even multiple times a day during heat waves.
- Place Tree Gators, a drip irrigation bag, on newly planted trees for slow, steady watering that will soak down to the root system without draining away along the surface of the soil.
If you’ll be away on an extended vacation, or even just for a few days, make arrangements with a trusted friend or neighbor to “plant sit” while you are gone. There’s nothing worse than worrying about your garden while you’re away – except coming home to crisp plants that haven’t been watered properly!

Watering When Away
 It’s vacation time! You’re going to be gone for two weeks or more, your friends, neighbors and family members are all busy and the weatherman says it’s going to be “hot, hot, hot.” What about your houseplants?
Fear not! A few minutes of thoughtful planning and a quick trip to the garden center will ensure meeting your plants’ watering requirements even when you can’t be home for daily moisture checks. Popular and effective solutions include…
- Pre-Watering: Before you leave on your trip, make sure your plants are well-watered. Many houseplants can withstand some watering neglect, and if you aren’t gone too long, they may not need any supplemental solutions if you’re watered them right before your trip. Take care not to overwater, however, or you could be compounding the problem.
- Anti-Drought Solution: Prior to leaving, water with an anti-drought solution. It temporarily forces the plant into dormancy. This reduces the water requirement for roughly two weeks (effective control will vary by product and plant type) while the solution gradually wears off. This can affect blooming or growth periods, however, so read instructions carefully and use the solution exactly as directed.
- Self-Watering Containers: Planting your houseplants in self-watering pots is truly looking ahead. A reservoir holds water under the pot, and this water gradually travels to the soil via a wick, always keeping the soil moist so long as the reservoir contains water. If you want to use a specific pot without a built-in reservoir, use a conversion kit. Various sizes are available and some use fill tubes. Consider adding liquid fertilizer to the reservoir water to ensure your plant gets proper nutrition while you are away.
- Individual Pot Drippers: These generally hold water above the plant. Various sizes and styles provide water to small and large pots. From beautiful blown glass globes to simple plastic bottles, these allow water to drip down into the soil through a drip-tip inserted in the soil. One style even looks like a flask attached to the side of the pot with a tube dripping water to the soil. Because they show above the plant, many people only use them during their vacation.
- Automatic Watering Systems: These are more elaborate but very effective options. A large water reservoir feeds to clustered houseplants through small tubing attached to drippers inserted in the soil. Larger pots use two or more drippers. These systems pump water on a regular basis using a battery and timer, making them ideal for regular watering when you may be taking a longer trip. These also allow liquid fertilizer in the reservoir so your plants are properly nourished.
Go ahead and enjoy your trip…your plants should be fine!
Long-Blooming Perennials for Summer

 By choosing long-blooming perennial plants, you can capitalize on the best of both worlds – plants that come back from growing season to growing season, and those that bloom for an extended length of time. This also means you’ll have more time to appreciate the gardens you create!
Here is just a sampling of long-blooming perennial plants perfect for the sunny summer garden:
- Achillea (Yarrow) is a very drought and heat resistant plant once established. The flower heads are long-lasting and many colors are available including yellow, gold, pink and pastels in apricot, lilac, salmon, cream and white. Plants grow from 8-36″ tall, depending on variety. The flat-topped flower heads grow up to several inches across, and make excellent cut and dried flowers. The fern-like, gray to gray-green foliage is somewhat aromatic and attractive even when the plant is not in bloom.
- Coreopsis (Tickseed) is one of the easiest and most rewarding garden flowers. The thread leaf varieties are usually the longest blooming, typically from June through fall. The pale yellow, bright yellow or rosy-pink daisy flowers smother the slender stems and thread-like leaves. Plant height, from 15-24″, is variety dependent. A mid-summer shearing of the seed heads will keep these plants blooming for many more weeks.
- Echinacea purpurea (Purple Coneflower) is a sturdy, bold-textured favorite with dark foliage that grows to 2-3′ tall and wide. The flowers are large, daisy-like with unique standings of dark-rose purple and lighter in color. Birds and butterflies also love these flowers, adding even more beauty to your garden with their visits.
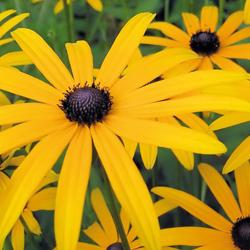
- Rudbeckia (Black-Eyed Susan) is an old-fashioned garden favorite. It is hardy, reliable, insect and disease-free and an exceptionally long-blooming plant – typically from July through fall. This medium-green, bold-foliaged plant grows to about 3′ tall and bears golden yellow, daisy-like flowers with dark brown centers. Both Echinacea and Rudbeckia flowers make excellent cut flowers and a wonderful place for butterflies to sit and eat.
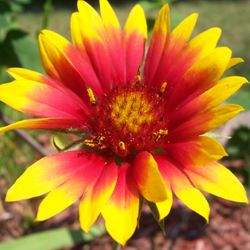
- Gallardia (Blanket Flower) is an American native plant which thrives in the hot sun and has beautiful yellow-orange flowers, marked with red. Height varies according to variety. Some favorites include “Baby Cole” which is a dwarf only 8″ high, “Goblin,” a 12-15” grower, and “Burgundy,” which reaches 18-24” and whose flowers are a gorgeous shade of burgundy red.
- Ceratostigma plumbaginoides (Plumbago) features intense blue flowers from mid-summer to September. Plumbago spreads quickly to form a neat groundcover and as an added bonus, leaves turn a brilliant red in the fall before dropping. This excellent perennial grows well in light shade also.
- Veronica (Speedwell) has neat, attractive foliage and abundant flowers in densely packed spikes. Look for the cultivars ‘Goodness Grows’ and taller ‘Sunny Border Blue’ for a beautiful addition of blue to your summer garden, and pair it with red or white favorites for a patriotic theme.
Remember, this is just a brief glimpse of the long-blooming perennials available to choose from. Stop by to see our wide selection of perennials so we can help you determine which plants are best suited to your garden.
Summer Gardener’s Calendar

 Continue planting trees, shrubs, perennials, annuals, vegetables and herbs. Consider adding some exotic color to your deck or patio with tropical blooming plants. We have a great selection of color this summer.
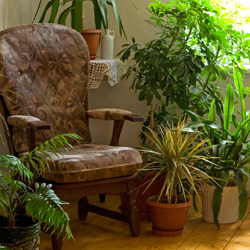
It’s time for your houseplant’s summer vacation! Take outside to a shady place. Repot if necessary, fertilize and check for pests and diseases. They’ll thrive in their outdoor location all summer. Be sure to bring them back inside in early fall.
Water plants and lawns deeply during periods of dry weather. Annuals, perennials, vegetables, trees and shrubs should be watered with a slow trickling or soaker hose. Pay extra attention to plants in containers and hanging baskets – check them regularly. Remember that clay pots dry out faster than plastic.
Apply a 2-3″ layer of mulch on your garden beds in preparation for summer. Mulch conserves valuable moisture in the soil, helps keep weeds down, maintains even soil temperatures, and gives an attractive finishing touch to your beds and borders.
Spray azaleas, Pieris japonica, laurel and Rhododendron with Bonide All-Season Oil to control lacebug. Spray early in the morning or evening when temperatures are moderate and there is no rain in the forecast.
Warm, humid weather encourages the development of fungal diseases such as Black Spot and Powdery Mildew on roses. Water roses in the early morning and avoid overhead watering if possible. Clean up any fallen leaves and follow a regular fungicide spray program. We recommend the Bayer Rose and Flower All in One for good control of fungus diseases.
Prune evergreens such as pines, cypress, hollies, euonymus and boxwood, to shape as needed. Remove faded flowers of annuals regularly, to encourage more flowers. Annuals will also benefit from regular applications of a water-soluble fertilizer right through summer.
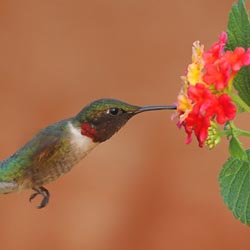
Attract hummingbirds and butterflies to your landscape by planting Butterfly Bush, Bee Balm (Mondarda), Hardy Hibiscus, Lobelia, Scabiosa and Coreopsis.
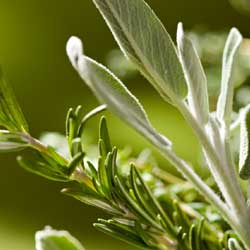
Grow Your Own Grilling Herbs

 There’s nothing that tastes more like summer than anything grilled – from a prime cut steak to a juicy chicken breast to all your favorite burgers, bratwurst, and garden veggies. But to bring out the fullest flavor of a grilled menu, you need the very best herbs. Why not grow your own herbs for the richest, freshest flavors right from your garden?
Flavoring with Herbs
Smoking is the most common and familiar flavoring technique for grilling, using different types of wood with subtle notes of maple, hickory, and apple to enhance meat and vegetables. Grilling with herbs can be even tastier and infuses grilled food with rich flavors and earthy freshness. This can also be a very healthy option for seasoning food, as there is no need for heavy sauces filled with salt and preservatives. Different combinations of herbs can also add many different flavor notes to beef, chicken, and fish, as well as creating more flavor depth for all types of vegetables.
Why Grow Your Own Herbs?
Herbs are at their most flavorful with the most seasoning power as soon as they are picked. The oils and flavonoids that add aroma and taste to herbs begin to evaporate and fade as soon as a sprig is snipped, and if you purchase herbs you have no way to know how long ago they were picked before they arrived at a store or farmer’s market and made it to your grill. If you grow your own grilling herbs in containers or right in your garden, however, you can snip, pick, pluck, and chop the herbs just seconds before they’re added to your grill, ensuring the most robust flavor and biggest impact on every dish you grill.
Best Herbs for Grilling
All different herbs can be used while grilling, though hardier plants with stronger flavors are typically preferred because they will stand up to the heat of the grill more easily, giving foods the best infusion of flavor. Popular herbs that are versatile for all types of grilling include:
- Chives
- Dill
- Mint
- Oregano
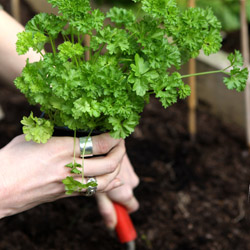
- Parsley
- Rosemary
- Tarragon
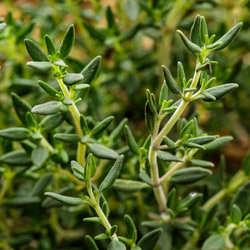
- Thyme
Choose different varieties of these great grilling herbs or your other favorite herbs to experiment with different subtle flavors, and combine herbs in different ways for amazing flavor profiles.
Grilling with Your Herbs
There are two different ways to grill with fresh herbs. Finely chopped fresh herbs can be sprinkled directly onto coals that have ashed over, and will add subtle aromatic flavors to any food being grilled. For stronger, more direct flavoring or for use in a gas grill without coals, use whole sprigs of herbs to create a mat or bed on the grill’s grate. Place the meat or vegetables directly on the herbs, similar to plank grilling, for direct infusion. To help release the herb flavors even more, soak the sprigs briefly before adding them to the grill for either cooking method.
Indirect heat is best for grilling with herbs, as it will give the meat more time to absorb the subtle flavors of the herbs, and the herbs will not burn or char, which could taint their flavor. Close the lid and allow the herbs to work their magic, and you’ll be rewarded with grilled meats and vegetables that are more amazingly seasoned and flavorful than you could have imagined.
More Flavorful Summer Foods with Herbs
Grilling with herbs can make meat the centerpiece of your summer dining experience, but there are many other ways to use your garden-fresh herbs in tasty dishes to accompany a grilled extravaganza. Add herbs to…
- Marinades to give meats even more flavoring before they’re grilled.
- Salads for more flavor notes that pair well with vegetables from your garden.
- Drinks for a unique flavor profile in summer teas and lemonades.
With so many uses for grilling herbs – both on the grill and off – you’ll want to be sure to add plenty of these flavorful plants to your garden for a full menu of delicious summer options.
Spring Flowering Fantasy
The arrival of spring is evident more in the blossoms of trees than anything else. The joyful coloring of the landscape by spring-flowering trees truly lifts the spirits – the pinks and whites of dogwoods and crabapples, the glorious blossoms of magnolia and ornamental pears that magically appear almost overnight. Together, they proclaim that winter is finally over.
Some of our favorite early flowering trees include:
Magnolia – The first to bloom is the Star Magnolia with its many petaled, white flowers. A week later several varieties of Saucer Magnolias make their debut with big, rich, full, cup-shaped flowers in shades of white, pink and purple.
Ornamental Pear – Smothered with small white flowers, Ornamental Pears also have rich leaf color in late fall. Use as a specimen or accent as well as a street tree.
Ornamental Cherry – Every landscape should have at least one cherry tree. The breath-taking Weeping Cherry announces spring’s arrival, followed by the famous Yoshino Cherry of Washington D.C. Next, the popular vase-shaped Kwansan Cherry explodes into bloom with deep pink, double flowers.
Redbud – An adaptable tree with charming bright purple flowers along its bare branches. ‘Forest Pansy’ also boasts purplish foliage all summer. This is one of the few trees that will tolerate shade.
Dogwood – Our native Dogwood is one of the most beautiful flowering trees. Graceful flowers in white, pink and red appear to float on its bare branches. In fall, leaves turn to a reddish purple color with clusters of red berries.
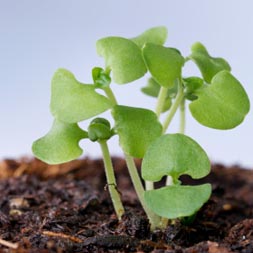
Seed Starting
Starting seeds indoors is a rewarding gardening experience and can help extend your growing season to include more plant varieties than your outdoor season may permit. Furthermore, a larger selection of seed varieties doesn’t limit your opportunities to growing only those transplants that are available at planting time. The key to success in growing seedlings is in creating the proper environment.
What Seeds Need
Seeds are generally hardy, but to start them properly they do need gentle nurturing so they can produce healthy, vibrant plants. In general, seeds should be started 4-6 weeks before the recommended planting time so the seedlings will be large and strong enough to withstand the stresses of transplanting. Use a sterile growing mix which is light enough to encourage rich root growth. Sow the seeds thinly and cover lightly with sphagnum peat moss. Water using a fine spray but do not soak the seeds – they also need oxygen to germinate, and if they are overwatered they will drown. Cover the container with clear plastic to hold the moisture and increase humidity. Place the containers in a warm (70-80 degrees) spot and watch daily for germination. The top of the refrigerator is often an ideal location. When the first seeds germinate, place the seedlings in bright light or under artificial lights (tube lights should be 2-3” from seedling tops) for several hours each day, since late winter sunlight will not usually be sufficient to prevent weak, leggy seedlings. Daytime temperatures should range from 70-75 degrees. Night time temperatures should range from 60-65 degrees.
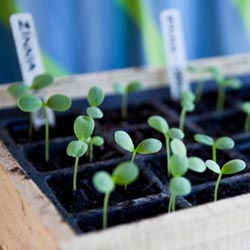
As Seeds Grow
When the seedlings develop their first true sets of leaves, add half-strength water soluble fertilizer to their water – organic fish emulsion or seaweed fertilizers are great to use. Repeat every second week to provide good nourishment. Thin the seedlings or transplant them to larger containers as they grow. Before planting outdoors, harden-off the plants at least one week before the planting date. Take the transplants outdoors in the daytime and bring them in at night if frost is likely. Gradually expose them to lower temperatures and more sunlight. The use of hotcaps and frost blankets to cover early plantings will also aid in the hardening off process so the seedlings can adjust well to their new outdoor environment.
Transplanting Seeds
Transplant seedlings into the garden after the safe planting date on a calm, overcast day. Pack the soil around the transplant with as little root disturbance as possible. Sprinkle the plants with water, keeping the soil moist until the plants become established.
Popular Indoor Seed Start Dates
The exact dates you want to start seeds will vary depending on your local growing season, the varieties of plants you choose and what their needs are. In general, dates for the most popular produce include…
Vegetable Seed Starting Dates
- February – Asparagus, celery, onion
- March 1 – Broccoli, Brussels sprouts, cabbage, cauliflower, collards, kale, lettuce
- March 15 – Eggplant, peppers, tomatoes
- April 1 – Summer squash
- April 15 – Cantaloupes, cucumbers, winter squash
Flower Seed Starting Dates
- January/February – Begonia, carnation, geranium, impatiens, nicotiana, pansy, rudbeckia, salvia, snapdragon, verbena, vinca
- March 1 – Ageratum, dahlia, dianthus, petunia
- April 15 – Aster, calendula, celosia, marigold, zinnia
Use seed starting dates as a general guide to ensure your seeds have plenty of time to reach their full harvest potential before the weather turns in autumn. At the same time, consider staggering seed starting every few days to lengthen your harvest and keep your favorite vegetables and flowers coming even longer during the growing season. As you gain more experience with starting seeds, you’ll be able to carefully plan your seed calendar to ensure a lush, rich, long harvest season.
Early Spring Gardening Calendar
 * Plan your summer vegetable and herb garden. We offer a wide selection of seeds that include all of your favorite annuals, perennials, vegetables and other novelties as well as many hard-to-find selections. Inventory your pots and flats and discard unusable ones. Make a list of the supplies you will need. Have your garden soil tested for nutrient content. We offer a variety of do-it-yourself soil test kits.
- Prune woody plants while dormant, including fruit trees, summer- and fall-blooming shrubs and vines. Limit pruning of spring-blooming trees and shrubs to the removal of sucker growth and rubbing or broken branches. Spray trees and shrubs with year-round horticultural oil to reduce insect population.
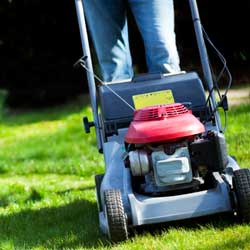
- Sharpen, clean and oil tools and lawn mowers. Begin heavy annual pruning of shrub roses as new leaves appear.
- Plant pansies, English daisies and primrose as soon as the earth is workable. Plant strawberry plants. Sow cool-season vegetables and herbs in the garden.
- Start spring cleanup and begin major lawn work. Remove debris, dethatch your lawn or aerate compacted areas to improve water penetration.
- Spray needles and limbs of Arborvitae, Cryptomeria, false cypress, fir, hemlock, Juniper, pine, yew and spruce (except blue spruce) for spider mites with year-round horticultural oil.
- Apply fertilizer to perennials and roses with. Feed berry bushes, grapevines, rhubarb and asparagus a balanced 10-10-10 fertilizer before new growth begins. Fertilize trees and shrubs.
- Apply crabgrass preventer with fertilizer to feed the lawn and control crabgrass. Do not use on newly seeded lawns.
- Continue spring cleanup. Cultivate to remove winter weeds and debris from the planting beds. Apply corn gluten or a pre-emergent herbicide with fertilizer specified for gardens and scratch it in to prevent future weeds. Do not use in gardens where you will be direct seeding.
- Reseed bare spots in established lawns. Keep the area moist until seedlings appear, then mow when the new grass is 3″ high.
- Prune forsythia and other spring-flowering trees & shrubs after the flowers fall.
Fall Chrysanthemums
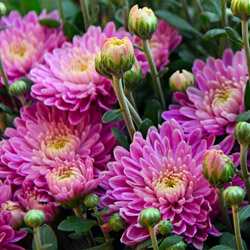
 No flower is more iconic of autumn than the chrysanthemum, and these beautiful mounding perennials are ideal for fall flowerbeds, pots, window boxes, borders, and many other uses. How will
you get creative with chrysanthemums this fall?
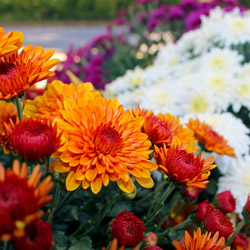
Why We Love Chrysanthemums
Just when many other flowers are fading at the end of summer, chrysanthemums, or mums, are coming into their glory with a range of stunning autumn colors. Depending on the cultivar, these plants sport yellow, white, red, orange, bronze, pink, peach, wine, purple, and bicolored blooms. The flowers range from small, button-like blossoms to larger blooms reminiscent of daisies. Mum blooms are long-lasting when cut and they’re just as lovely in floral arrangements and bouquets as they are planted in containers, flowerbeds, and the landscape. This makes mums extremely useful for all manner of autumn décor.
Chrysanthemums are native to east Asia and northern Europe and were first domestically cultivated in China nearly 600 years ago. Today, there are more than 20,000 chrysanthemum cultivars worldwide. They are deer- and rabbit-resistant, making them a hardy option for landscaping beds, and with a bit of thoughtful care, these tender perennials can be a wonderful addition to any flower garden or fall containers.
Caring for Chrysanthemums
The hardiness of chrysanthemums depends on the cultivar as well as the local climate and even the microclimate in your landscape. These flowers prefer well-drained, rich soil with a neutral pH, so it is best to use a good quality potting soil in containers. When planting chrysanthemums in the garden or landscape, mixing compost or peat moss in the planting hole will help increase drainage and nourish the soil to promote the best blooms. A good rule of thumb is that if soil is good for vegetables, it will also be good for mums – making them a wonderful choice to refresh a garden after the summer harvest has finished.
Chrysanthemums grow best in full sun requiring a minimum of six hours per day. If mums are planted in containers, consider using a mobile plant cart or a stand with casters so that the pots may be moved to brighter areas, if needed, as the season progresses.
Chrysanthemums prefer evenly moist, but not soggy, soil. Because of their thick, mounding habit, it is best to water mums from below suing a soaker hose or irrigation drip system in garden beds. In pots, mums should again be watered from below the plant but above the soil line. A watering wand will make this job direct and easy. Be sure to drain excess water from saucers after watering so the roots do not remain continually wet.
Fertilizing chrysanthemums every month through the spring and early summer, with a balanced fertilizer, will help them grow and bloom well, but if mums are planted in the Fall, they should not need extra feeding as long as they were planted in rich, nutritious soil. Deadheading spent blooms by pinching them back can encourage more flowering and help mums maintain their compact, mounding habit.
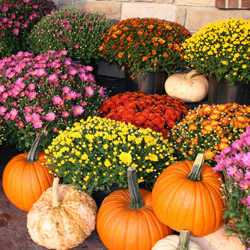
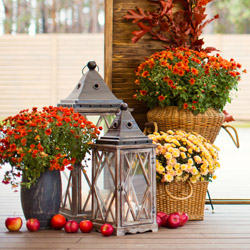
Decorating with Fall Mums
Chrysanthemums are a beautiful choice not only in the garden, but are equally lovely in welcoming porch pots, deck or patio containers, or even small indoor pots and arrangements. Add an extra touch of fall with rustic containers, such as wine barrels, baskets, or terra cotta pots, or glam up your mums in hammered copper or bronze pots that will accentuate their color. A burlap ribbon or bow can be a charming accent, and you can give more seasonal flair to mum arrangements or flowerbeds by adding pumpkins and gourds as fun decorations. Indoors, use small pails or pots for petit mum arrangements, or add them to larger arrangements with grain sprigs, dried pods, colorful leaves, or twists of grapevine for additional texture.
Fall chrysanthemums can be a pleasant burst of autumn color, whether they are part of the landscape or are used in containers, pots, or arrangements and we carry a wide selection to make your fall home suit the season!