


Creating Depth and Character in the Garden
No matter what you grow, your garden does not have to be a bland, predictable space. With careful planning, it is easy to create depth and character in the garden to reflect your personal flair and the enjoyment you find among your flowers, fruits, vegetables and herbs.
Understanding Your Foreground, Middle Ground and Background
Before planning your garden to enhance its depth and character, it is important to understand the different levels of space you have to work with. Your garden’s location, size and shape, as well as the overall layout, are part of these levels and can help you plan the best design to reflect your personal style.
- Foreground – The front of your garden, including borders, edging, fences, and entryways, as well as the first plants a visitor encounters when stepping into the space. Visually, this area is the welcome to your gardening or landscaping space.
- Middle Ground – The bulk of the garden or landscape, the center or middle areas. This will include most open spaces and the most heavily used parts of your garden, those that are accessed and admired the most.
- Background – The furthest, rear point of your gardening space, that provides a backdrop or endpoint for the design. This can include rear fences, walls or property borders and is the stopping point for your garden.
As you design your garden, each of these areas can be enhanced to create a more aesthetically pleasing space and an overall design rich in texture, color and creativity.
Depth in the Garden
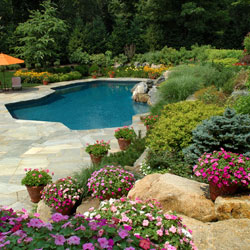
Adding depth to the garden varies the space and makes the garden appear larger and more spacious. This can easily improve a narrow landscaping area or open up a small garden, and it maximizes growing space to allow for more plants. Great options to add more garden depth include…
- Tiers
Tiers, with taller plants at the back and shorter plants in the foreground, expand the space and give it a better scale. Taller plants can be added in corners or at the sides, with shorter plants filling in the center. Terraces, containers and raised beds can all create tiers. - Colors
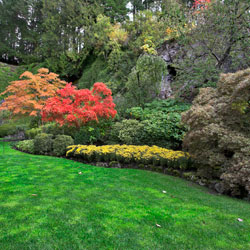
Warm colors, such as red, yellow and orange, are bold and filling, and are best used at the front of the garden to create a welcoming flow. Cooler tones, such as greens and blues, are best in the background where they recede from the eye and give an illusion of greater depth and openness. - Contrasting Textures
Gardens and landscapes look smaller when they are uniform. Textural contrasts, however, break up sightlines and add more visual interest, enhancing depth. Opt for finer textures and airy plant structures to increase depth in the middle ground and background, while fuller, more compact textures are best in the foreground. - Plant Size
Positioning larger, taller plants in the background and reserving smaller plants for the foreground of your garden will enhance its depth. In small gardens, dwarf or miniature plant varieties immediately create greater depth and make the space seem more generous. - Secret Spaces
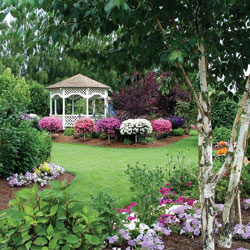
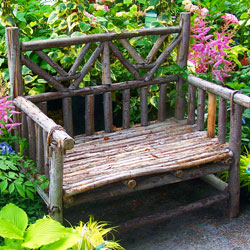
Adding a secret space will create depth as it draws the eye into the landscaping design and encourages more detailed examination of the area. Meditation niches, cozy benches or swings, or other places invite more interest in the garden and improve the depth. - Reflections
Just like a mirror creates more depth in a small room, reflections create more depth in a garden. Gazing balls, reflecting pools or mosaics are great options, but be sure there are no overly focused reflections that might damage nearby plants with excess glare. - Views
If your garden overlooks a dramatic view, such as a mountain range, ocean cliff or adjacent park, take advantage of that view for more personal garden depth. Avoid blocking the view, and instead frame it to draw the eye deeper into your space. - Vertical Gardening
Taking your garden vertical with climbing plants on a green wall, trellis or other support is a great way to increase depth and add more gardening space. Many vegetables and flowering vines can easily be trained to grow vertically.
Character in the Garden
Adding character to the garden personalizes it to reflect your unique style and flair. This adds a meaningful touch to your space, no matter how big or small it may be. Fun ways to give your garden more character include…
- Specimen Plants
Unusual plants create a focal point in your garden and draw the eye into the space. Even in a veggie garden or berry patch, an unexpected specimen can be an interesting feature. - Unique Shapes
Give your garden extra flair by incorporating unusual shapes, such as topiaries or plants with unexpected foliage or flower shapes. This extra texture will also enhance the garden’s depth. - Curves
Gardens and landscaping don’t need to follow straight lines. Help your landscape flow with curved garden rows, curving beds or other smooth, elegant lines. - Fill-Ins
Bare spaces cause a disjointed look in the garden, but you can easily fill in patches with extra herbs, flowers or ornamental grasses. This will add even more texture and interest to the area. - Welcomes
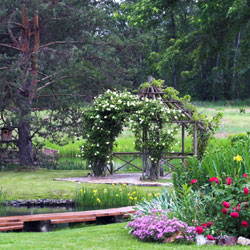
Welcome visitors to your garden with a fun, customized gate, quirky arbor or unique archway. This feature will draw the eye and encourage visitors to enter and enjoy the space. - Curbing
Get creative with curbing to border your garden area with personal flair. Instead of predictable options, choose colored curbing or add accents such as glass bottles or stepping stones. - Wildlife
Welcome wildlife to your garden to add life to the space. Bird feeders and baths, a butterfly, bee or toad house, or even a koi pond can bring movement and life to your garden. - Surprises
There’s always room in the garden for a surprise or two. It might be a hidden gnome peeking out at guests, scattered sunflowers that grow through other plantings, exotic edibles or flowers with potent perfumes to lure guests in to seek out the surprise.
You can add depth and character to your garden in many ways. If you aren’t sure just how to go about personalizing and enhancing your garden, ask our experts for help to create the garden of your dreams!
How to Design Your Outdoor Living Area for Mixed Generations
Creating your perfect landscape can be a project that lasts a lifetime, but how can you effectively design your outdoor living area when your needs, activities and preferences may change over the years? Fortunately, with a little careful consideration, you can create a functional and beautiful landscape that all generations of your family will enjoy.
Assess Your Landscape
When you’re planning outdoor spaces, it is critical to work with what already exists in your landscape. This means creating a landscape that flows with the contours of your property, is suitable for your overall space and will thrive in your climate. Before planning extensive landscape work, consider…
- Soil quality and condition and any adjustments that may be required
- Irrigation needs, including sprinkler systems, runoff and natural rainfall
- Sunlight levels and how light changes throughout the year
- General climate and microclimates throughout the yard
- Views from different angles, including those you may want to preserve or block
- Existing structures, pathways and borders that may or may not be altered
- Potential trouble spots, such as narrow yards, steep slopes or poor drainage
By thoroughly understanding your landscape before you begin redesigning an outdoor space, you can effectively plan proper landscaping that will thrive rather than struggle.
Assess Your Needs
Once you know what you already have to work with in your landscape, you can assess what your needs are for an outdoor living space and how you can create a fun and enjoyable sanctuary in your yard. The needs of toddlers, teens and adults can be very different, however, and it is important to note how preferences may change in the years to come. By thinking ahead, you can make full use of your landscape through different life and family stages without needing to redesign the yard every few years. Consider your family size and how it may change, including whether family members may move away or move closer, whether different family members may be interested in different outdoor activities and how changing schedules may affect how your landscape is used over time.
Planning Outdoor Spaces for Changing Needs
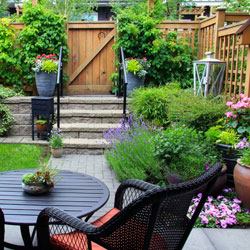
It may seem impossible to plan a beautiful landscape that will be just as enjoyable and useful a decade from now as it is today. Considering different aspects of your outdoor living space one by one, however, can help you develop a master landscape plan that your entire family, as well as friends, neighbors and guests, will enjoy for years. When designing your outdoor living space, consider…
- Seating
There should not only be enough seating for the entire family to share, but also for entertaining. This might include casual kids’ parties, summer barbecues or more formal events such as a graduation party or bridal shower. While you may not have a seat for every guest over the years, be sure there is space to add additional seating for special events if needed. - Storage
From garden tools and children’s toys to sports equipment, patio cushions and outdoor holiday decorations, there is always a need for more storage related to your landscape. A shed is a good option, or integrate storage areas that will serve multiple purposes such as built-in storage benches or bins that are part of the patio or deck design. - Gardens
If you want a productive, delicious garden as part of your landscape, opt for adjustable gardening areas such as raised garden beds, container gardens or vertical gardening spaces. These types of gardens are more easily adjusted over the years as your desire and needs for fresh produce changes, as well as being more adjustable for garden care. - Activity Areas
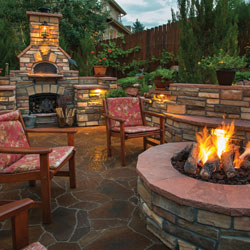
Plan activity areas in your outdoor space that can be modified over the years to meet different needs and preferences. A play structure in an open area, for example, can be removed when young children outgrow it, and that same area can become a badminton court for the whole family. A fire pit area, yoga space or meditation niche can also be adjusted through the years. - Pathways
Getting from one area to another in your yard should be easy for everyone to navigate. Broader pathways will be easier for unsteady youngsters as well as seniors with mobility assistance, and shallower steps are easier for feet of all ages. Be sure paths are level and even, and plants should not overgrow busy traffic areas. - Entertaining
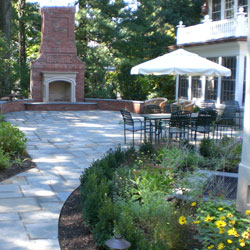
If you enjoy entertaining in your yard, be sure to incorporate gathering spaces for groups to enjoy. This might include a fire pit with conversation seating, a grilling area with good access to tools and supplies or even an outdoor kitchen for more elaborate parties. Proper lighting or a speaker system for music can also be essential for an outdoor entertaining space. - Lighting
You will want to see your outdoor living space and enjoy it even after the sun goes down. Pathway lighting, spotlights on focal points and fun string lighting or outdoor chandeliers in entertaining areas can all be part of your lighting design to keep your outdoor space functional as well as festive after dark. - Privacy
Always consider privacy when designing your outdoor living space, not only from nearby streets or neighbors’ yards, but also from different areas of your yard. Be sure there are good sightlines where necessary, but also consider cozier niches where individuals or smaller groups can feel more private. Plants, screens and lattices or trellises are all good options for enhancing privacy. - Plants
Choosing plants for your landscape is easy when you consider not only your own future needs, but the future needs of the plants as well. Note the mature sizes and growth patterns of plants when placing them in your landscape, and consider how much maintenance they may require over the years to be sure you can give them the care they require even as your life changes. - Focal Points
Focal points can unite your landscape and bring it together visually, even as your needs may change. An eye-catching specimen plant, for example, can become the backdrop for family events and photos, and these familiar sights will always be welcome to your family even as its composition changes.
No matter how your outdoor living space may need to change over the years as your family and its preferences change, you can plan a versatile, adaptable space to change with your family. What won’t change, however, is how much you can enjoy that space and how it will bring your family together for many memorable moments.
Need help planning the perfect landscape for your family’s diverse and changing needs? Our experts can help you craft outdoor living spaces you will enjoy for years!
The Sweet Scents of Spring
Each year, we gardeners grow antsy as winter draws to a close but it seems spring will never arrive. Daily, the season teases, tempts and enchants us with the slightest offerings as the temperatures rise, a balmy breeze brushes our cheeks and the days grow a bit longer, but all we see is a world of gray and white muck, dull skies and bare plants. Finally, there is a flamboyant explosion of branch, leaf, bud and bloom that renders our famished sense of sight satiated when in just a short time spring literally springs to life.
Close Your Eyes and Sniff
Sight, however, is not the strongest of senses, smell is. Even before we see signs of spring, we can smell it in the air. Science has proven that pleasant scents have a positive effect on the brain causing feelings of contentment, relaxation and happiness. Scent is also one of the strongest memory triggers, and a whiff of a favorite bloom can remind us of all the joy we find in gardening and the pleasure our spring blooms can bring. With this in mind, why not plant your early spring garden to satisfy the nose and improve your disposition?
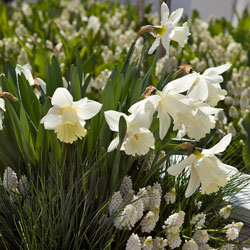
Early Flowers, Early Scents
Bulbs provide some of the earliest spring blooms. Many gardeners have long enjoyed the sweet scent of hyacinth but it’s not well known that there are countless other fragrant flower bulbs to captivate our sense of smell. Some of these blossoms are already familiar spring favorites, and their perfumes may be best appreciated if the bulbs are planted closer to the nose. Consider adding these bulbs to a tall pot, a window box or a garden bed atop a stone wall and you’ll smell them even easier. These flowers are also well suited for cutting and enjoying indoors in a vase, where they will bring the sweet scent of spring indoors even if the season isn’t yet well advanced in the garden.
Fragrant Spring Bulbs
These are just a few of the more fragrant, early-blooming bulbs and their sweet-smelling cultivars that can bring the scent of spring to your garden. Which ones will you try this year?
Narcissus
- Large Cupped Daffodils
- ‘Carlton’
- ‘Flower Record’
- ‘Fragrant Breeze’
- ‘Ice Follies’
- ‘Romance’
- ‘Professor Einstein’
- Small Cupped Daffodils
- ‘Edna Earl’
- ‘Polar Ice’
- ‘Sinopel’
- Double Daffodils
- ‘Bridal Crown’
- ‘Cheerfulness’
- ‘Erlicheer’
- ‘Flower Drift’
- ‘Obdam’
- ‘Sir Winston Churchill’
- ‘Tahiti’
- ‘White Lion’
- ‘Yellow Cheerfulness’
- Jonquilla Daffodils
- ‘Baby Moon’
- ‘Bell Song’
- ‘Pink Angel’
- ‘Pipit’
- ‘Pueblo’
- ‘Punchline’
- ‘Quail’
- ‘Sailboat’
- ‘Stratosphere’
- ‘Sundisc’
- ‘Suzy’
- ‘Trevithian’
- Poeticus Daffodils
- ‘Actaea’
- ‘Pheasant’s Eye’
- Triandrus Daffodils
- ‘Hawera’
- ‘Ice Wings’
- ‘Petrel’
- ‘Thalia’
- Tazetta Daffodils
- ‘Avalanche’
- ‘Cragford’
- ‘Geranium’
- ‘Minnow’
- ‘Silver Chimes’
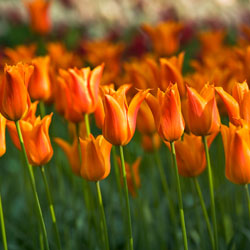
Tulips
- Species:
- Tulip biflora
- Tulip ‘Little Beauty’
- Tulip ‘Little Princess’
- Single Early:
- ‘Beauty Queen’
- ‘Bellona’
- ‘Candy Prince’
- ‘Christmas Dream’
- ‘Christmas Marvel’
- ‘Couleur Cardinal’
- ‘Keizerkroon’
- ‘Princess Irene’
- Double Early:
- ‘Abba’
- ‘Mondial’
- ‘Monsella’
- ‘Monte Carlo’
- ‘Montreux’
- ‘Peach Blossom’
- ‘Schoonoord’
- Triumph:
- ‘Annie Schilder’
- ‘Apricot Beauty’
- ‘Attila’
- ‘Bastogne’
- ‘Cairo’
- ‘Hermitage’
- ‘Jan Ohms’
- ‘Salmon Pearl’
- Darwin Hybrid:
- ‘Daydream’
- ‘Holland’s Glory’
- ‘Lightening Sun’
- ‘Silverstream’
- Parrot:
- ‘Apricot Parrot’
- Lily Flowering:
- ‘Ballerina’
- ‘West Point’
- Double Late (Peony):
- ‘Abigail’
- ‘Angelique’
- ‘Black Hero’
- ‘Carnavel de Nice’
- ‘Casablanca’
- ‘Crème Upstar’
- ‘Hermione’
- ‘Lilac Perfection’
- ‘Maravilla’
- ‘Maywonder’
- ‘Miranda’
- ‘Mount Tacoma’
- ‘Orange Princess’
- ‘Upstar’
- ‘Wirosa’
- Single Late
- ‘Dillenburg’


Phased Landscape Installation
Redoing your landscape, whether you are starting from scratch, updating parts of an existing design or completely renovating your yard, can be a lengthy and expensive process. Phased landscape installation can help you adjust your time, labor and budget to create your dream landscape in easy-to-manage steps.
How Phased Landscape Installation Works
Instead of doing an entire large landscape at one time from start to finish, phased landscape installation breaks the project into more manageable pieces. It may take several weeks, months or years to complete the landscape installation in phases, depending on the size of the project and what resources are available to complete it.
Phased landscape installation can be beneficial in several ways. Not only does it make a large project more manageable, but it also allows for tweaks and refinements throughout the process as needs, preferences and living styles may change over time. Installing a landscape in phases can also better accommodate a limited budget or limited time with shorter seasons, while still allowing for the yard, garden and landscape to be used and enjoyed before the full project is complete.
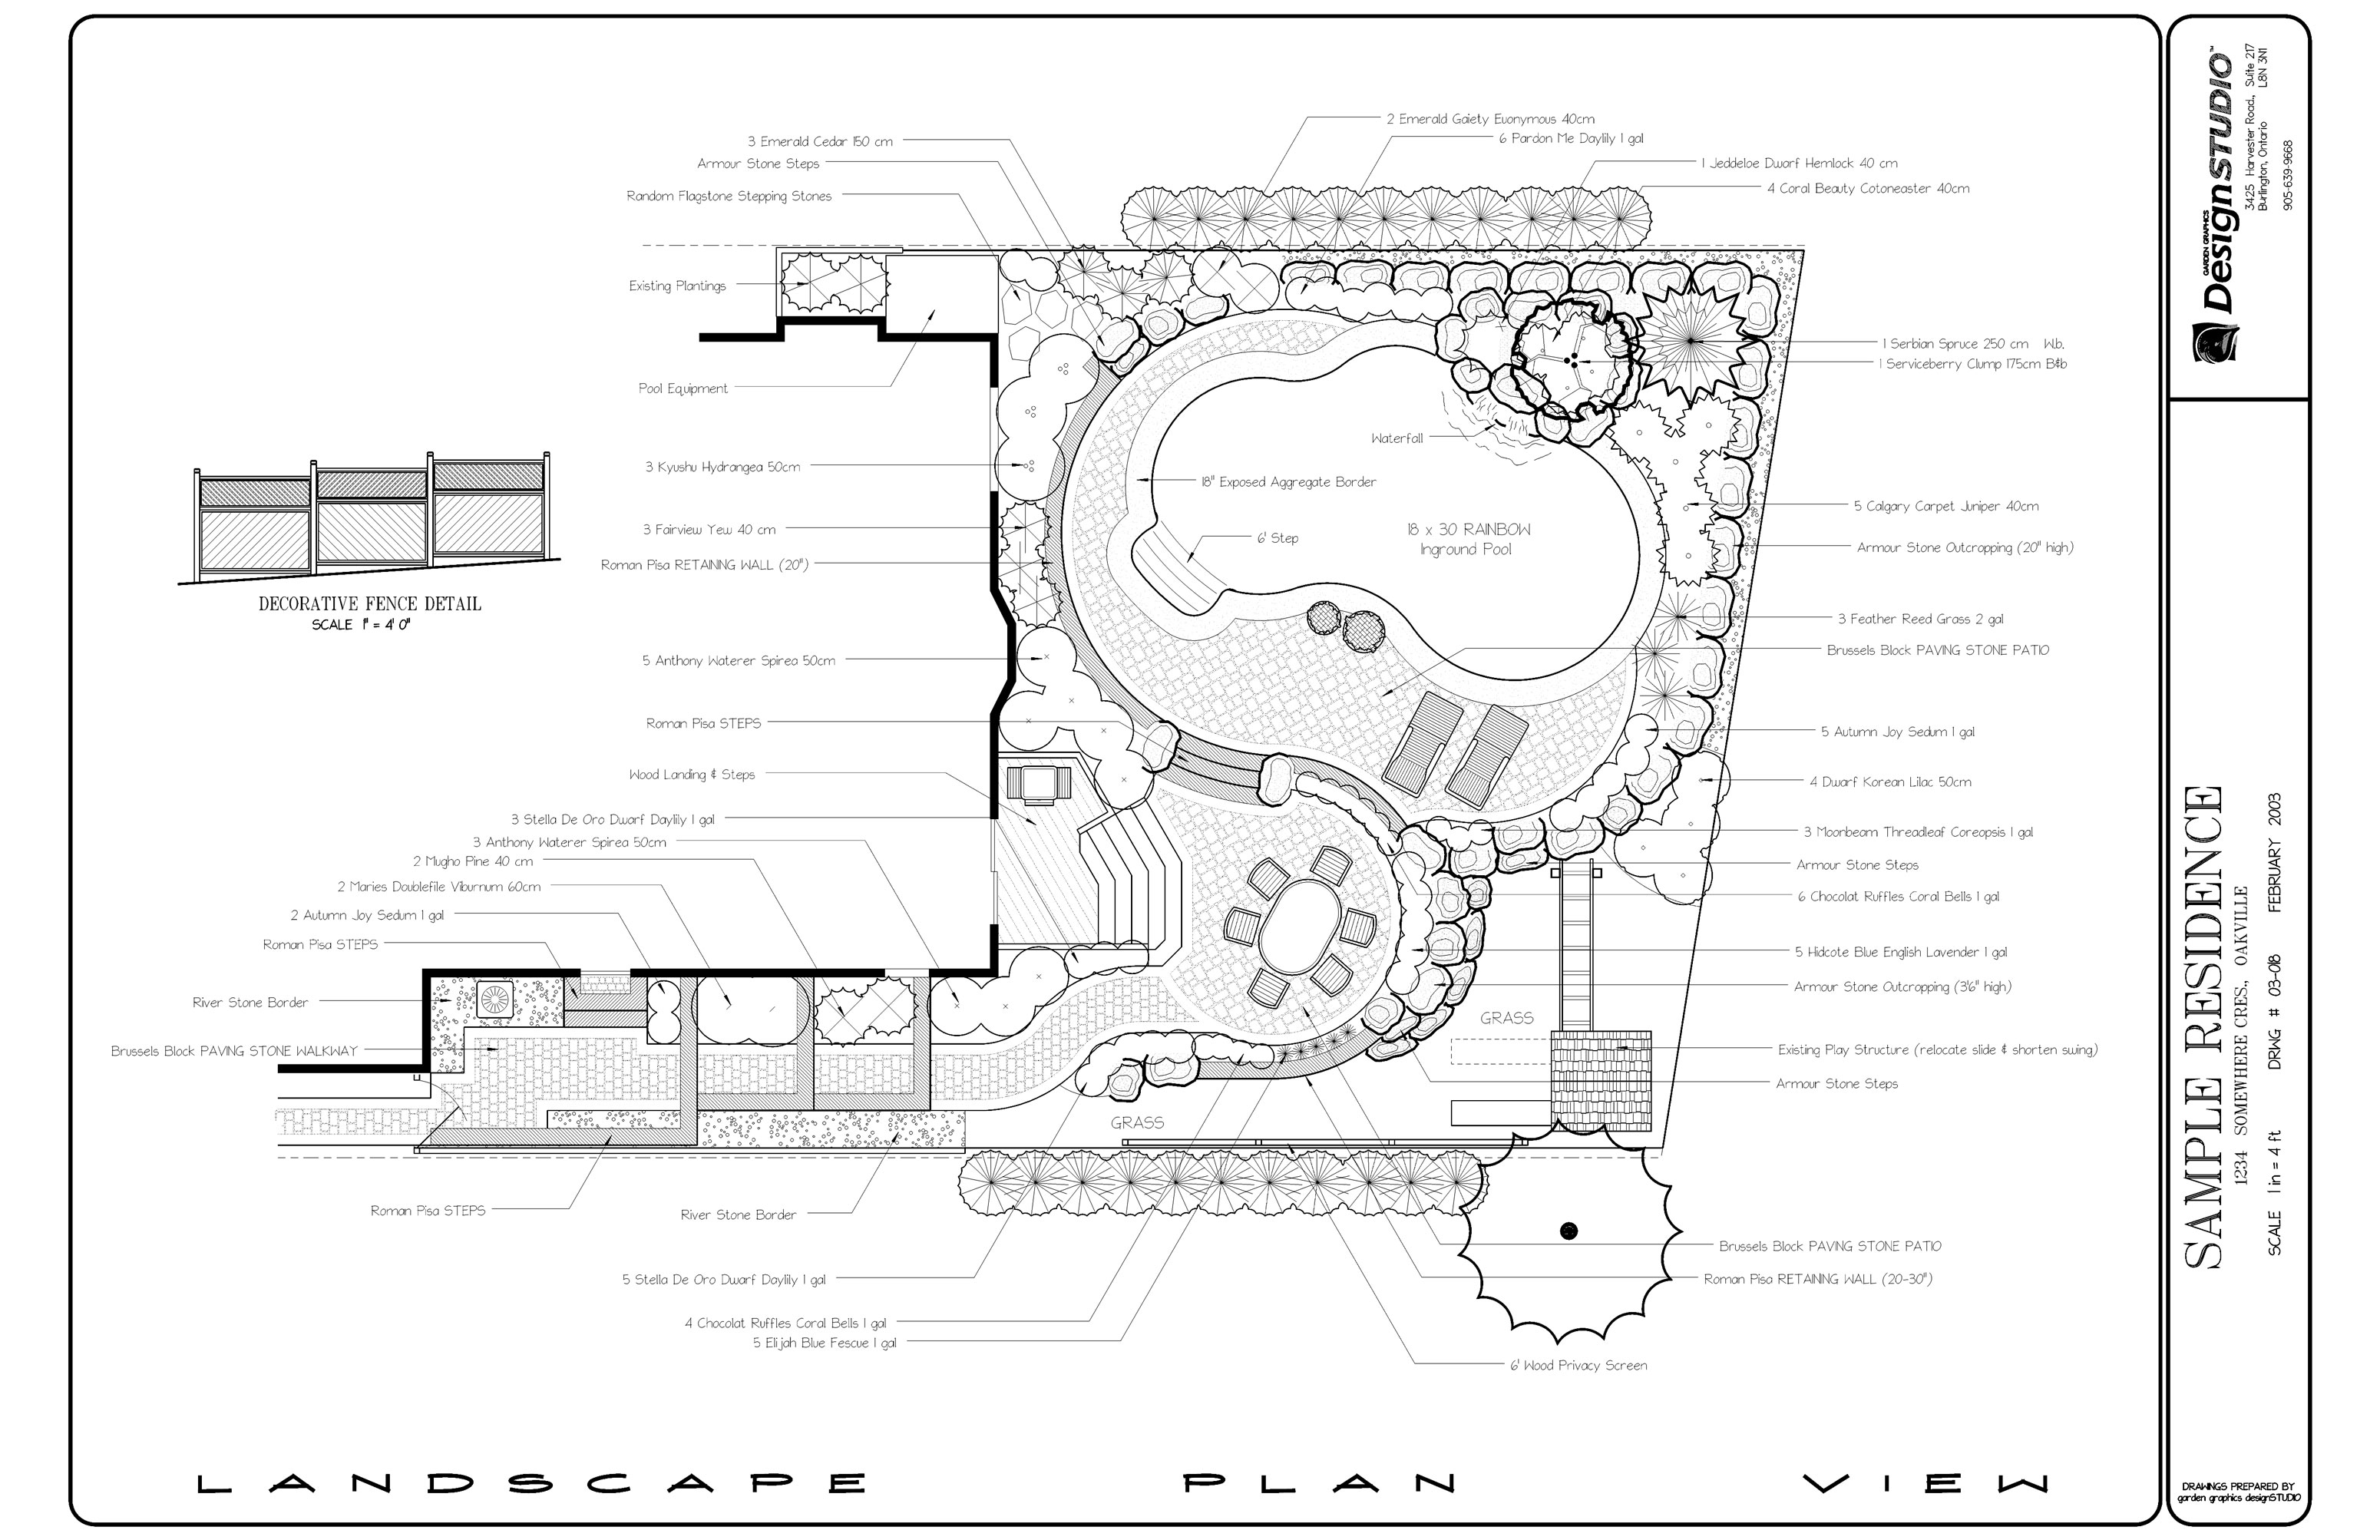
Designing a Master Landscaping Plan
Creating a master landscaping plan is a critical first step in phased landscape installation. A master plan is necessary to keep the landscape’s end result in mind, and that plan can be adjusted as needed throughout the different phases. When the full project can be envisioned, it is also easier to plan the order of phases to be installed with the greatest efficiency so there is less disruption to established parts of the landscape when a new phase is begun.
The first part of a master plan should involve a comprehensive evaluation of the site and its landscaping needs. This should include soil condition and quality, drainage concerns, sunlight levels, potential erosion problems and more. This evaluation can help direct the landscape installation to correct difficulties with each step. After the overall evaluation, the first phases of landscape installation need to be sufficiently detailed for the project to get underway. Later phases and finishing touches may change by the time the final phase of installation is ready to begin, and so those phases may not necessarily be as firm when the landscaping plan is first developed.
It is important to keep the master plan accessible, especially when it may take several years to fully install a larger, more elaborate landscape. Notes, changes, suggestions and updates should all be documented. This will ensure that all contractors and experts – who may change over the years – are aware of the overall landscape vision.
Landscape Phases to Plan
The order of projects in phased installation will vary depending on the overall master plan for the landscape, as well as how each phase is integrated into the overall process. Needs and preferences can also influence which phases are implemented first to ensure the landscape is usable and enjoyable from the very first phase. Typical phases in a landscape plan may include…
- Surfaces – Sod, seeding, groundcovers, or mulching for erosion control and visual appeal.
- Hardscapes – Borders and edging, terraces, retaining walls, etc.
- Gas and Electrical Lines – Support for water feature pumps, lighting, outdoor kitchens, etc.
- Irrigation – Sprinkler systems and drip plans as well as drainage adjustments.
- Shade – Large trees and plants to provide shade for outdoor living spaces as well as structures.
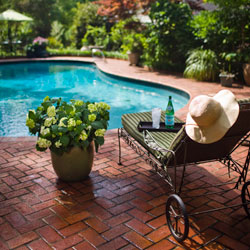
- Entertaining Space – Patios, decks, pool surrounds and similar high use spaces.
- Structures – Pergolas, trellises, arbors, sheds, play structures, etc.
- Waterscapes – Ponds or pondless waterfalls, creeks and streams, or fountains.
- Garden Space – Raised beds or dedicated growing areas for practical harvests, fruit trees, etc.
- Pathways – Connections between parts of the landscape or around the entire home.
- Plantings – Shrubbery and flowerbeds, specimen plants, etc.
While the order of phase installation can vary greatly, many plans opt to put surfaces, hardscapes and shade early in the master plan. Surfaces are often used right away and help a landscape look attractive even as the plan is being implemented, while hardscapes establish the borders that will gradually frame the entire landscape. Shade is also important to implement early, as larger trees have slower growth cycles and will take longer to mature and provide their full benefits, so the sooner they are planted the sooner they will be providing that shade. Of course, depending on the exact budget and master landscaping plan, several phases may be implemented at once, or smaller phases may be spread out over a greater period.
In addition to these potential phases, it is important to consider the final phase of landscape installation – care and maintenance. Particularly when plants are young and the ground may still be settling, extra care may be needed to nurture plants and ensure they adjust to their new environment. Proper care, including pruning, fertilization and pest control, will help keep the landscape looking just as attractive and inviting as it is from the first moment of installation.
Are you considering phased landscape installation? Our experts can help develop your master landscaping plan and recommend the best phases to create your dream landscape!

The Use of Focal Points in the Landscape
We have all used focal points in our daily lives, from showcasing favorite photos in a gallery wall to throw pillows adding a pop of color on the sofa to choosing accessories to highlight our best features. But did you know you can use landscape focal points in a similar way, drawing the eye to the very best features of your home and property to accentuate its unique characteristics and highlight its beauty? Learn how to truly showcase your landscaping with the best focal points to give your home extra flair.
What Is a Focal Point?
A focal point is a highlighted, outstanding feature that draws the eye and grabs attention. In the landscape, this can be nearly any type of feature, from plants to structures to hardscaping to ornamentation. Popular landscaping focal points include…
- Unique specimen plants, either unusual varieties, unique shapes or exceptional sizes
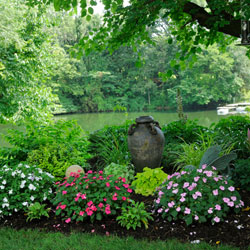
- Water features such as ponds, waterfalls or fountains
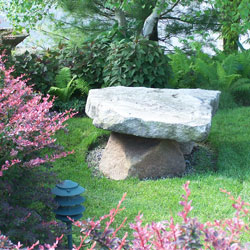
- Boulders, terraces or other dramatic hardscape details
- A bird feeding station or other wildlife-oriented feature
- A colorful flowerbed, container garden or even a dramatic window box
- A statue or sculpture, even as simple as a gazing ball or sundial
- Inviting structures such as gates, arbors, pergolas or arches
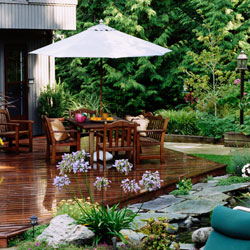
- A seating area or other outdoor gathering space
- A uniquely designed pathway, such as a mosaic, stepping stones or bridge
- Specially designed pavers, such as a mural-like feature
A focal point can be anything unique, whether it is a naturally-occurring feature of the existing landscape or something you have dreamed of adding to your yard or garden.
The Purpose of a Focal Point
While a focal point initially draws the eye, it actually does far more than just attract attention. A well designed landscape will work with focal points to bring order and dimension to the yard, centralizing the view and directing guests’ viewpoints. A focal point can add character to the yard as well, whether it creates a sense of natural elegance, adds a chic, modern touch or even introduces a bit of whimsy to the landscape. Focal points can also help distract from less aesthetically pleasing views, such as drawing attention away from a neighbor’s yard, minimizing the appearance of a trouble spot or redirecting sightlines away from a utility box or air conditioning unit.
Choosing a Landscaping Focal Point
Which focal point you choose for your landscape will depend on several factors, and you want to consider each one carefully when planning to use a focal point.
- Yard Size: The focal point should be proportionally sized to the yard. A too-large focal point will overwhelm a small, intimate yard, making it seem more crowded and cramped, while a too-small focal point can be lost in a larger space.
- Landscape Style: A focal point should coordinate with the style of the yard and garden. A cozy cottage garden can look great when focused around a romantic statue or elegant bird bath, but a stark obelisk would look out of place.
- Seasonal Changes: Ideally, a focal point will remain attractive and eye-catching throughout the year, even with seasonal changes in nearby plants and light levels. Opt for a focal point that can be enjoyed year-round for the best results.
- Viewing Angles: A good focal point will draw the eye in a pleasing way no matter where it is viewed from, including different angles, windows or approaches. Paying attention to every viewpoint will ensure the focal point serves its purpose however it is viewed.
Once these factors are considered, a landscape may have one or more focal points. So long as they are balanced and appropriate to the yard’s design, they can be beautiful features that will be stunning highlights in the landscape.
Designing Your Landscape Around a Focal Point
Once you have selected a focal point for the landscape, it is best to coordinate the landscape’s overall design to enhance and complement that focus. This will ensure its beauty and prominence in the landscape without creating an overwhelming or dominating effect. Easy ways to design your landscape around a focal point include…
- Paying attention to symmetry to draw the eye to the focal point. You may opt for a completely symmetrical, geometric layout to lead the eye to the focal point, or choose a deliberately asymmetrical design that builds dramatically to the focus.
- Coordinate colors, plants and other features to work with the focal point rather than contrast and detract from it. Coordinated colors, shapes and textures – even when used in variety – can add to your focal point and enhance its beauty and drama.
- Highlight the focal point without blocking it from view, particularly when considering views from different angles and in different seasons. This may include regular pruning and other care to keep the surrounding landscape in check.
- Keep the focal point in good condition so it is not a disappointment when it draws the eye. Plants should be properly pruned and shaped, while statues and other accents may need regular cleaning. Structures may need regular repairs or repainting to look their best.
- Consider muting nearby landscaping features to further highlight the focal point. Opt for more subtle plants and fewer accents away from the focal point to ensure no other areas of the landscape compete with the intended focus.
- Design pathways, borders and lighting to highlight the focal point and draw attention to the appropriate space, both visually and physically. This will keep your focal point centralized in the landscape at all times, serving its purpose as your landscape highlight.
A focal point is more than just a highlight of your yard, it can become the centerpiece of your landscape, set the mood for your outdoor space and showcase the beauty of your home. Working with a focal point can help you draw together the entire space in an eye-catching way you’ll always be proud to see.
Want to design your landscape around an appropriate focal point? Our design experts can help you choose just the right focus and create a stunning look to highlight your landscape’s best features!
Choosing a Japanese Maple
We’re certain you’ve heard it numerous times: fall is the best time to buy your Japanese maple. Have you come into the garden center to pick one? Did the varieties overwhelm you? Let us make it easier for you by explaining Japanese maple differences. Then, when you come in, you’ll know exactly what you want.
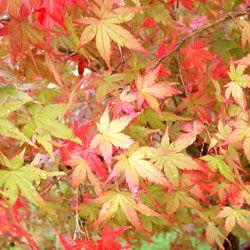
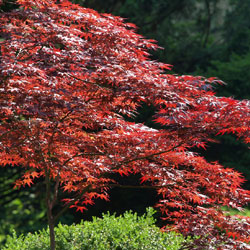
The species Japanese maple, Acer palmatum, moderately grows to a 20′ by 20′ multi-trunked tree. The leaves have 5-9 finely cut lobes giving them a more delicate look than other maples. Red spring leaves turn to green in the summer and blaze with yellow, orange and red in the fall. All do best with protection from drying winds and hot overhead afternoon sun. During their centuries of use in gardens around the world, gardeners have discovered and propagated those selections with unusual growth habits and bark patterns, as well as leaf color and shape. With hundreds of Japanese maple varieties available at garden centers, we feel a little simplification is in order.
- Leaf Shape
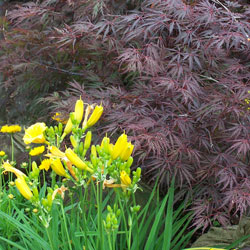
The variation Dissectum or Laceleaf Japanese Maple has leaves are deeply cut and finely lobed giving a lace cutout look. These varieties generally grow best in shady locations as the leaves easily burn or scorch. The leaves of non-Dissectum varieties are much less lacy. They resemble the leaves of native maples but are smaller and more deeply cut.
- Leaf Color
The leaf color of different Japanese maples also varies. Many have red spring growth changing to green in the summer. However, some retain the red through the growing season. Some varieties have variegated leaves with white, cream, gold or pink. Variegated leaves burn easily in the sun but can revert to all green in too much shade. Green leaves tolerate more sun than red. Autumn is when Japanese maples really put on a show with a riot of blazing colors.
- Tree Form
Non-Dissectum varieties grow more quickly into upright forms. Some varieties remain less than 10′ tall but others can grow to 25′ tall by 20′ wide. Laceleaf maples slowly develop a weeping form approximately 8-10′ tall and 8-12′ wide. However, ‘Seiryu’ is an exception, growing into an upright form.
|
Laceleaf (Dissectum) |
Non-Dissectum |
|
|
Location |
More shade |
Less shade |
|
Size |
Smaller |
10-25′ tall depending upon variety |
|
Tree Form |
Weeping |
Upright |
|
Leaf Shape |
Lacy, fine cut |
Lobed |
|
Leaf Color |
Red, green |
Red, green, variegated |
Now that you have identified a suitable planting location and the type of Japanese maple you prefer, come see us and let our friendly staff show you the varieties that meet your requirements. Autumn colors are blazing now so this is a great time to make your selection.
Winter Interest in the Garden
Many gardeners think of the fourth season as a time for rest, but winter can be interesting and fun to plan for a bold, appealing landscape. While most of us plan our landscapes for bloom times in spring and summer, there are many plants offering color and texture appeal for the cold season landscape.
Winter Beauty in Your Landscape
Winter is a time of special beauty and interest. Berries sparkle on shrubs under a layer of frost and ice, while other shrubs have shades of bronze leaves that cling and rattle in winter breezes. The leafless branches of larger trees cast dramatic shadows across the freshly fallen snow. Bark hidden by the leaves of summer stands out gorgeously in the winter. Barks of silvery gray, white, green, yellow, purple or red hues add a burst of color when the landscape is covered in white. Even barks that are deeply fissured, sleek as satin, peeling in thin layers or curiously pocked by a pitted surface give interest to a wonderful winter landscape. Dried grasses stand out in bright contrast against the backdrop of dark evergreens, shaking snow off their delicate heads. There is even the surprising yellow ribbon-like blooms of witch-hazel which flower in mid-winter or the delicate lavenders and blues of tiny species of crocuses under the snow. Pansies are also a great addition for late-season winter color in your flowerbeds. Everywhere you look, there can be beauty in the winter landscape.
Top Plants for Winter Interest
Many different plants offer interesting features that reach their full potential in the winter landscape. Popular options include…
- Paperbark Maple (Acer grisium)
- Threadleaf Japanese Maple (Acer palmatum dissectum)
- Red Chokeberry (Aronia arbutifalia)
- Shagbark Hickory (Carya ovata)
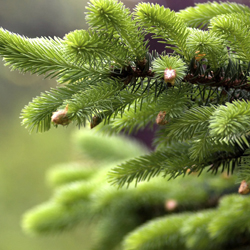
- Blue Atlas Cedar (Cedrus atlantica ‘Glauca’)
- Harry Lauder’s Walking Stick (Corylus avellana ‘Contorta’)
- Winter Dephne (Daphne odora)
- Common Snow Drops (Galanthus nivalis)
- Wintergreen (Gaultheria procumbens)
- Christmas Rose (Heleboris niger)
- Chinese witch-hazel (Hamamelis mollis)
- Winterberry Holly (Ilex verticillata) Need female and male plant for berries
- Christmas fern (Polystichun acrostichoides)
- Common Camellia (Camellia japonica)
- Heathers/Heaths
Not sure which plants will offer the beauty you want to see all winter long? Our experts are always happy to help you plan the best landscape design for all four seasons, so come in and share your ideas today and we’ll help you be prepared for an amazing winter landscape.
A Buffet of Berries for Winter Birds
Plants with berries add winter interest to the garden and also attract many different types of birds. But which berries are best for your yard, and how can you ensure a bountiful buffet for your feathered friends to enjoy?
Caring for Berries
No matter which berries you choose to add to your landscape, opt for varieties native to your region. When berries are native, they are more readily adapted to the local climate changes, including the temperature extremes of winter. Furthermore, regional birds will recognize the berries more easily and will enjoy them as a safe and familiar food source.
Plant berry bushes as early as possible so the plants have plenty of time to become established in your landscape and bear copious amounts of fruit for the winter. Water them well throughout the summer and fall to encourage a good crop of plump, rich berries. Avoid pruning the bushes in autumn, and instead leave the branches intact, complete with their tasty treats. Not only will winter wildlife enjoy the feast, but the extra shelter from unpruned bushes will also be appreciated.
Best Winter Berries
There are many different types of berries that can attract winter birds, but two standouts are top picks for winter interest, not only for the birds but for their beauty in the garden.
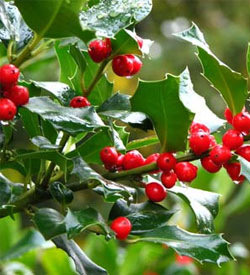
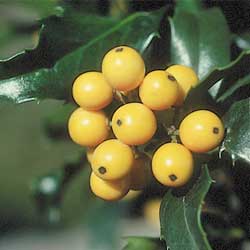
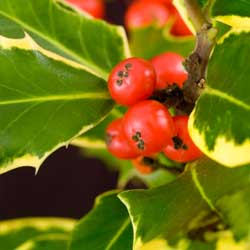
- Hollies
Offering long-lasting bird forage, this group of plants provides great cover and nesting sites as well as edible berries in shades of red, orange and yellow. And, because the berries ripen at different rates even on the same bush, hollies provide food for several months. Winterberry and American holly are easily pruned as shrubs or small trees and are almost always within pollinating range because they are natives. Birds that seek holly berries include robins, blue jays, eastern bluebirds, red-bellied woodpeckers and more, including grouse and quail. The sharp-edged foliage is also a deterrent to predators, and cut branches can be stunning holiday decorations if desired.
- Pyracantha
This easy to grow plant has a huge feathered following. In addition to different thrushes, bluebirds, woodpeckers, grouse and quail, pyracantha, or firethorn, also attracts cardinals and purple finches. The dense clusters of orange, yellow and red berries look like a blaze of fire in the winter landscape, and the thorny branches provide superior protection from predators as well as shelter from winter storms.
Winter birds will love the berries they can find in your yard, and you will love the visual interest and seasonal color these beneficial plants provide.

Pruning Fundamentals
Pruning is essential to keep your trees and shrubs in good shape, but it can be intimidating if you’ve never pruned before. Once you learn the fundamentals, however, you’ll realize it isn’t as hard as it may seem.
Tree Pruning
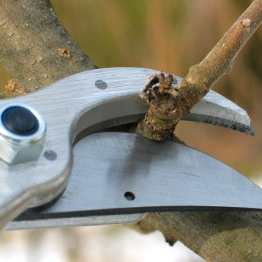
The first thing to look for when pruning a tree is broken, diseased or dead branches, all of which should be removed to preserve the overall health of the tree. The next thing to be concerned with are suckers and water sprouts. Suckers can be either bottom suckers coming from the root system or growths originating from the trunk. In either case, they reduce water and nutrient flow to the main portion of the tree and should be removed. Another problem growth is called a water sprout, which is very noticeable because it grows straight up from a branch. Water sprouts also rob water and nutrients from the tree.
After all of these problems have been corrected, a second look at the tree should let you know what other limbs should be removed. Removing large limbs is perhaps the most difficult part of tree pruning. It requires two cuts in which one cut removes the weight of the limb and prevents tearing of the bark. The second cut is made closer to the trunk and removes the remaining stub, but should be no closer than the branch collar. Smaller limbs may also be removed to help preserve the desired shape and size of the tree if needed.
Pruning Deciduous Shrubs
Many deciduous shrubs can really benefit from annual pruning. Pruning not only controls the size of these shrubs, but it can also increase flower production and encourage colorful bark.
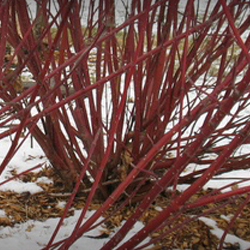
Let’s begin with a few of the more common shrubs, such as lilac, forsythia and weigela. These shrubs are most commonly known for their flowers, so we should prune them accordingly. By removing a portion of their oldest stems entirely we can encourage younger growth, which will give us more flowers. Plants such as red and yellow twig dogwood have colorful stems which can be enhanced by removing the older gray stems. Another group of plants that benefit from pruning are the spireas and potentillas. These plants are treated a little differently in that they are cut down to about 4 or 6 inches in the fall or early spring. By pruning them this way, we increase their flowering and yet remove all of their twigginess that would look unsightly throughout the winter and early spring.
There are many other trees and shrubs that require more detailed pruning recommendations and careful guidelines. Please email us your questions or stop by the store, we always have people available to answer your questions whether they involve specific plant recommendations or which pruner is the right one for you and the pruning job you need to do.
Keeping a Garden Journal
Do you remember exactly when you planted your seedlings last year? What was the date of the first frost? Did you see a unique cultivar at the nursery and wanted to give it a try? How well did that new pest-control technique work on your prize flowerbed? Whether you are recording your landscape, a vegetable garden or both, the details make the difference, and a garden journal can help you keep track of those details to build on your own gardening expertise.
What to Record
A garden journal does not have to be intimidating, and you do not have to be either an expert writer or an expert gardener to keep one. You are simply keeping record of your garden and notes on what worked, what didn’t, want you wanted to try, what you wanted to change and more. You might keep one journal just for your landscape, another for your vegetable garden, even one for an indoor herb garden. Depending on the journal type, you may record different things in different ways, but don’t worry – it’s your journal and you can keep it however you want.
- Your Landscaping Garden Journal
Use a journal to record your landscaping activities. A simple sketch of your landscape provides a basic plan. Track the dates of planting and blooming, fertilizer applications, pruning and other maintenance duties to determine if the activities are worthwhile and effective. Map the placement of bulbs and perennials so you don’t have to remember over the long season when they disappear. Note your color combinations. Did they look good or was something missing? Maybe you saw an article with some ideas to try, so tuck it in and remember try it. - Your Vegetable Garden Journal
A journal can help you keep notes about your vegetable garden. Use graph paper to design your plantings. Next year you can use this sketch to plan your veggie rotation to keep your soil rich and your harvest productive. Note the dates of pest treatments, fertilization, thinning and other activities. By recording the details in a garden journal, it serves as your memory, reminding you what you planted, how it did and what you could do better and easier. Wouldn’t it be nice, at the end of the season, to see how much money you saved by growing your own produce? Keeping track of expenses and harvest quality will do it. - Your Indoor Garden Journal
Whether you just have a few houseplants, a simple windowsill herb garden or an elaborate setup for starting seedlings, you can use a journal to keep track of all your plants. Note when you add new plants to your displays, the frequency of watering, foliage changes, bloom cycles and herb harvesting. Note seasonal changes in your plants, and when it is necessary to repot.
A garden journal provides a great place to save sketches, lists and photos. Depending upon your personal use, they can store excess seeds and plant tags, bed rotation and fertilizing schedules, even gardening brochures.
Now is a perfect time to start a garden journal. You’ve been cooped up in the house during the long winter and probably have lots of ideas about the upcoming garden. Beginning a garden journal now ignites your creativity, sets your goals for the upcoming year and lets you plot your upcoming journey. Twelve months from now, when you look back and review your goals and plans, you’ll see how much you’ve done. Then, you can look forward to the next year and make a great plan, thanks to the notes you’ve kept.
Come see our assortment of garden journals. Whether you prefer loose-leaf or bound, simple lined paper or adorned with sketches, we have just the right garden journal to get you excited about the upcoming gardening season.