

General Soil Amendments
We’ve all heard of the importance of amending the soil properly for gardening and landscaping, but the number of soil amendments sold in garden centers often confuses gardeners. Which is which, and which will work best for your soil conditioning needs?
Types of Soil Amendments
Soil amendments fall into two basic categories: inorganic and organic. Inorganic amendments come from non-living materials such as sand, perlite, vermiculite, and crushed stone. With the exception of limestone and gypsum, which are used to increase soil calcium, these are not commonly used in the garden.
However, organic amendments are the opposite. They come from previously living materials such as peat, manures, and composts. When leaves, bark, peat, animals, and animal wastes are mixed together to decompose, compost or “humus” is the final product. Very commonly used, these materials enrich the soil by increasing the air space, adding extra nutrients to the soil, improving the absorption of those nutrients, and increasing overall soil fertility.
Why You Need Soil Amendments
Excellent soil is not common around most homes. Even if it was initially, house construction and roadwork often remove the good soil, and construction equipment compacts the remaining soil. Furthermore, heavy use of the remaining turf — children and pets playing, for example — continues to compact the soil. Chemical treatments, runoff from gutters and downspouts, removal of existing plants, changes in local wildlife— all of these factors can wreak havoc on soil.
Adding organics loosens compacted soil and results in better gardens. Incorporate organics into the beds throughout the year by working evergreen needles, leaves, and lawn clippings into the soil. Amendments such as peat or lime can improve a pH problem if one exists. Calcium and magnesium deficiencies can be corrected using organic materials such as bone meal or wood ashes or inorganic materials such as limestone, gypsum, or soft rock phosphate.
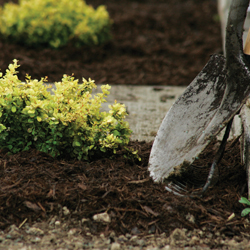
Mulching is another simple way to add biodegradable materials to the soil. Simply place mulch around the plant, leaving several inches bare closest to the stem to discourage insect invasions and rot. In addition to slowly providing nutrients as it decomposes, mulching is attractive, reduces weeds and erosion, maintains soil temperature, and prevents “crusting” that occurs when soil becomes too dry.
Another advantage of adding organics is the attraction of worms. They further assist in the decomposition, increase aeration, and leave worm castings, a valuable organic material, behind. A healthy garden is home to many worms, and it all starts with adding organic soil amendments.
Whether you opt for organic or inorganic soil amendments, if you use them properly, your soil will improve, and your landscaping, flowerbeds, and garden will look better than ever.
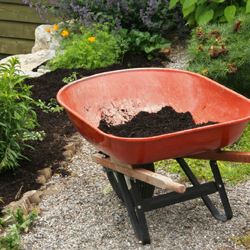
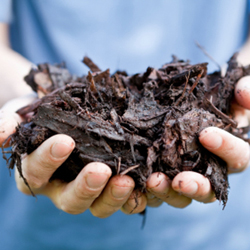
mulch, compost, tree bark, bark, gardening, blue, green, hands, holding, work, hands cupped, messy, dirt,
Fourth of July Porch Pots
Fourth of July Porch Pots
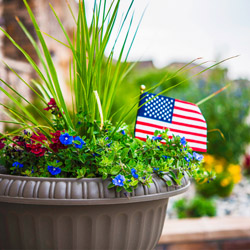
A porch pot can be a beautiful accent to any entryway, and with a bit of patriotic flair, you can easily style a Fourth of July porch pot as a decorative highlight for all your summer festivities. By carefully designing the pot and the plants it showcases, it can burst into festive glory just in time for the holiday.
Beyond the Porch
A porch pot is traditionally an elegant container positioned at the main front entryway, but for summer porch pots, it’s fun to look beyond the porch for where to show off your festive container. Where will you be greeting guests and entertaining during the summer months? Any gathering spot can be made more seasonal with the right porch pot, so consider placing one or more pots:
- In the corners of a deck or patio
- Spaced along a bare section of fence
- On stairs leading up to a deck or porch
- Framing an outdoor kitchen or grill area
- Accenting a pool surround
- As an outdoor table centerpiece
Wherever your pots can be seen, they’re sure to add a patriotic bit of color to give a party-like atmosphere to your outdoor living spaces.
Picking the Pot
When choosing a container for a Fourth of July pot, first consider where the pot will be located and choose an appropriate size for that location. Be mindful that the pot will not block walkways or cause a trip hazard on stairs, and be sure it is sturdy enough to hold up the plants you want to showcase.
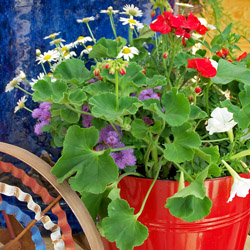
The pot style can vary, and choosing a pot with patriotic colors can add instant flair to your decorative arrangement. Red, white, or blue pots are always popular choices, or the pot could be painted with a patriotic theme such as stars and stripes. Spattering a white pot with red and blue is a more subtle but festive option, or larger polka dots could be a bold and colorful statement. To honor a military connection, consider a pot with a camouflage pattern, or choose a more demure, understated pot to let the plants be the true stars of the arrangement.
Top Fourth of July Flower Picks
You can add any type of flowers you’d like to a Fourth of July porch pot, but red, white, and blue blooms are always favorites. Fortunately, there are many flower choices that can work into this color palette, including:¦
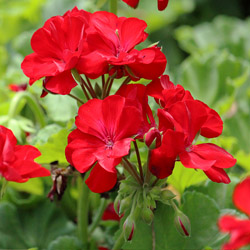
- Red – Petunia, zinnia, verbena, cardinal flower, impatiens, geraniums, nasturtium
- White – Zinnia, dahlia, geranium, verbena, daisy, petunia, cleome, vinca, snapdragon, impatiens
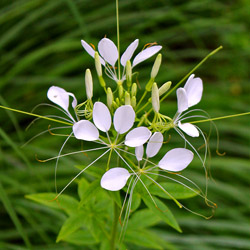
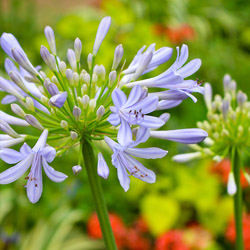
- Blue – Agapanthus, clematis, scabiosa, verbena, wishbone flower, lobelia, salvia, ageratum
In addition to bloom colors, you can also consider flower shape and opt for star-shaped blooms such as lilies, pentas, or star jasmine. Tall, flowing grasses with arcing plumes are another elegant option that mimics the gracefulness of fireworks. The round balls of allium and the spikes of salvia are other interesting shapes popular in patriotic displays.
Whichever plants you choose for your pot, remember the thriller-filler-spiller rule of thumb to create a lush, eye-catching arrangement, and it will sure to be a stunning decoration.
Planting Your Pot
Ideally, a Fourth of July porch pot should be planted several weeks before the holiday or any summer event so the plants have a chance to settle and fill in the pot before the celebration. If you’ve chosen a larger pot, add a layer of rocks or a brick or two to the bottom of the pot so it is properly weighted and will be less likely to tip over if accidentally bumped. Choose h potting soil to give each plant the proper nourishment, and ideally choose plants that all have similar sunlight and watering needs so they will thrive together.
Summer Porch Pot Care
Once planted, you will need to give your Fourth of July porch pot the proper care so it continues to look its best. Positioning the pot on a moveable stand or casters will help you be sure it has adequate light even as shadows shift from week to week, and rotating the pot will ensure the plants grow evenly. Water the pot appropriately, bearing in mind that smaller pots will need more frequent watering, especially on hot summer days. Fertilizing should not be necessary if you’ve used h potting soil, but if needed, fertilize sparingly to avoid burning roots or causing uneven growth. As the plants get taller, stake them if necessary, and protect the pot from sudden summer storms so it is not tipped or flooded.
Decorative Accents for a Fourth of July Porch Pot
It’s easy to add a bit of holiday flair to the pot if you choose decorative stakes with a red, white, and blue theme. Miniature flags are a popular choice, or you can find metallic sprays or faux firework rockets that will add a fun touch to the arrangement. Pinwheels are another great option that add a bit of movement to the pot.
Tying a ribbon around the pot can also add a holiday touch. Choose red, white, or blue ribbons, or opt for a rustic theme with gingham or checked patterns. Gold ribbons can also be a meaningful way to honor military members and deployed troops.
Be creative and fun with decorative accents for your porch pot, and it will be an eye-catching, attractive arrangement and a focal point for all your summer holiday entertaining.
Perennial Power
Perennial Power
Perennials may not be the best showstoppers in a garden full of annuals, but they make great foundation plantings to serve as a reliable backdrop or trusty fillers, among other plants. There’s no reason you can’t select perennials that are just as beautiful as your favorite annuals; however, it’s just a matter of choosing the flowers that pack the most punch and using them appropriately.
Best Perennials to Choose
When choosing a perennial to fill an empty space in your garden, make sure to get the most bang from your buck by selecting one or several long-blooming perennials. These flowers will be worthwhile additions to your landscape for their ongoing staying power, giving you a reliable backdrop and structure to build from.
- Achillea (Yarrow)
- Alcea (Hollyhock)
- Anemone (Wind Flower)
- Asclepias tuberosa (Butterfly Weed)
- Campanula (clips series)
- Clematis (Jackmani)
- Coreopsis (Tickseed)
- Corydalis lutea (Yellow Bleeding Heart)
- Delosperma (Ice Plant)
- Dicentra exima (Bleeding Heart)
- Doronicum
- Echinacea (Coneflower)
- Gallardia (Blanket Flower)
- Gaura (Wand Flower)
- Geranium (Johnson Blue)
- Helenium (Helen’s Flower)
- Heliopsis (Sunflower)
- Hemerocallis (Stella D’Oro) (Daylily)
- Hemerocallis (Happy Returns) (Daylily)
- Kniphofia (Red Hot Poker)
- Lavender
- Liatris spicata (Gayfeather)
- Ligularia (Ragwort)
- Lobelia cardinalis (Cardinal Flower)
- Lythrum (Loosestrife)
- Malva (Mallow)
- Monarda (Bee Balm)
- Nepeta (Catnip or Catmint)
- Oneothra (Siskiyou) (Evening Primrose)
- Perovskia (Russian Sage)
- Rudbeckia (Coneflower)
- Salvia (most verticillata)
- Scabiosa (Pincushion Flower)
- Shasta Daisy (Becky) or (Snow Queen)
- Stokesia (Stoke’s Aster)
- Veronica (Speedwell)
Using Your Blooming Perennials
To make your perennials truly pop, it’s important to position them in your landscape, where they will show to their best advantage. Popular options include:
- Filling in between showstopping annuals with perennials that will grow and bloom to cover fading blooms after the annuals are finished.
- Adding blooming perennials in front of a hedge, fence, or privacy screen for extra coverage with a dash of color.
- Using perennial flowers as a backdrop for lower annual plantings along a house foundation or in other flowerbeds.
- Creating a naturalized lawn or meadow-like area full of different perennials for a low-maintenance option that still stuns.
- Planting perennials in hard-to-tend areas, such as alongside a water feature, in tight corners, or on terraces, so they can be gorgeous with less maintenance.
With so many options for lovely perennials that can be used in many different ways in the landscape, there’s no excuse not to enjoy these easy-care flowers for many years!