


Healthy Soil, Healthy Plants
HEALTHY SOIL, HEALTHY PLANTS
The key to successful gardening is “healthy soil.” This basic principle of organic gardening applies to all plants. Quite simply, when you feed the soil the proper nutrients, you let the soil feed the plants. So how do you “feed” the soil? First, you need to understand some elementary information about your soil and why it is so important, and then you can take steps to improve it.
To start, you should determine the soil texture by moistening the soil and rubbing it between your thumb and fingers to determine it’s “feel.” Sands are gritty and will barely hold together; clay can be squeezed into a firm shape; and silt will act in a way to allow particles to cling together. Sandy soils tend to dry out quickly because they contain high amounts of soil air. Oppositely, clay soils have a tendency to pack together, shutting out air and water. The best garden soil, “loam,” has moderate amounts of sand, silt and clay. Generally, soil in our area tends to be clayey. This condition can be improved by adding a soil conditioner, gypsum or slate particles. For sandy soils, humus should be added to help retain moisture and nutrients.
Next, you must evaluate the soil structure. Soil structure is affected by soil pH, the amount of humus and the combination of minerals in the soil. Ideal soils allow soil particles to clump together with air spaces between them for water drainage as well as oxygen consumption and carbon dioxide release from plant roots. The best way to improve soil structure is to add high amounts of organic matter like humus, dehydrated manure, composted manure, mushroom compost, alfalfa meal, peat moss, or worm castings.
You will also need to take a soil sample, to measure the pH and amounts of nitrogen, phosphorus and potassium in the soil as well as other nutrients. This will help determine exactly what the soil needs. Your local Master Nursery Garden Center will help you read the results and determine what to add to your soil and how much. Generally, a pH of 6.0 to 7.0 is acceptable. If your pH is lower than this, your soil is too acidic and requires lime to be added. If your soil is low in organic matter, it will often have a high pH level. All plants require a proper balance of nutrients – nitrogen (N), phosphorus (P) and potassium (K). Soils lacking any one of these elements will not produce healthy plants. Refer to the Organic Fertilizer Chart for suggested amendments.
When dealing with poor or improperly balanced soils, obtaining “healthy” soil may take two to five years to acquire. The best thing you can do to supplement your soil program is to use various organic fertilizers to meet your plants’ needs and regularly add organic matter; we suggest Bumper Crop Soil Amendments, and Fertilizers. Black Forest, Gardener’s Gold, Pay Dirt and Pay Dirt Plus are all excellent choices as soil amenders that will continue to help the soil structure as well as create biological activity that is also a vital part of developing productive soil.
Key Words
Soil Texture – The proportional amount of sand, silt and clay in the soil.
Soil Structure – The arrangement of soil particles in the soil.
Soil pH – The measurement of acidity or alkalinity of the soil.
Organic Matter – Various forms of living and dead plant and animal matter.


Planting Trees and Shrubs
Before You Plant
Always plant in a well drained soil. To test for soil drainage, dig a hole for your new plant and fill it with water. If the water doesn’t drain in 12 hours, the soil in that area will need to be amended dramatically.
What Plant Form are You Transplanting?
Your tree or shrub will come in two forms: Balled and burlapped (B&B); or containerized. Containerized or B&B plants can be planted any time the ground is not frozen. If possible plant your tree or shrub as soon as you get it home. Otherwise, it may dry out and become injured. If you can’t plant it immediately, place it in a shady and/or sheltered location. Keep the soil moist until planted.
The Planting Hole
To plant your tree or shrub dig a hole twice as wide as the diameter and 6”-8” deeper than the root ball, replacing the 6”-8” of soil with enriched backfill. Compact this 6”-8” of soil. Once the plant is placed in the hole, the top of the root ball should be slightly above or level with the surface of the ground. Placing Your Plant in the Hole Remove all tags, wires or ropes from the stems or trunk, and do the following: Balled & Burlapped Plants: DO NOT remove the wire basket. Once the enriched soil has been placed ¾ of the way up the
Placing Your Plant in the Hole

Remove all tags, wires or ropes from the stems or trunk, and do the following:
Balled & Burlapped Plants
DO NOT remove the wire basket. Once the enriched soil has been placed 3/4 of the way up the root ball, cut & fold down the top 1/4 of the basket & burlap, remove any strings around the tree trunk. Fill the remaining hole with enriched soil to its original level.
Container Plants
Ease the pot off without disturbing the root ball. If the roots are extremely compacted, you may need to make a few shallow cuts through the roots on the side and bottom of the root ball.
Enriching Your Soil & Backfilling
Mix the soil taken out of the hole with Bumper Crop then backfill around the root ball. Tamp the soil lightly every 2”-3”, and fill the hole with the enriched soil to its original level. Use excess soil to build a ring 6” –10” from the outside of the hole. This will help the water to move slowly down to the root zone of the plant as well as minimize the runoff.
Watering
Water your newly planted tree or shrub by using a slow, deep watering method. B&B and container plant roots dry out faster than the soil around them, so it is important to monitor their soil moisture. Water slowly to attain deep water penetration which encourages widespread root development. You will need to water once every 7-10 days (or more during hot dry periods). Apply Root Master B1 after every watering
 General Watering guidelines:
1 gal. Pot – trickle water for approx. 15-20 minutes
2 gal. Pot – trickle water for approx 30-40 minutes
3 gal. Pot – trickle water for approx 40-50 minutes
4 gal. To 7 gal. – trickle water for approx 60 minutes
B&B – trickle water for 60-70 minutes
Remember, if it rains for 1 hr, it probably was not enough water for a newly planted shrub or tree.
 Water your plants thoroughly, then remove them from their pots by inverting them and supporting the root ball. If the roots are compacted, you may need to make a few shallow cuts through the roots on the side and bottom of the root ball. Place your plant into the hole. Add the enriched soil to ground level. Water the plant thoroughly to ensure the soil fills in completely around the roots, eliminating air pockets. Apply Rootmaster B1 at this time. Reapply Rootmaster B1 at every watering for the first year. Monitor your plants daily. Water slowly to attain deep water penetration which encourages widespread root development. Feed perennials bi-weekly with Bud & Bloom fertilizer. Add a 2”- 3” mulch layer around the plant. This will prevent water loss and keep mowers & trimmers from getting too close to the plant. Avoid overly deep mulch against the stem or trunk of the plant, as this can promote disease or pest injury.
Staking
Unless necessary, trees should not be staked. If your tree or shrub is top heavy or in an exposed area, you may stake the plant to anchor the root ball so roots can develop rapidly into the new soil around the tree. Connect the stakes to the trunk with flexible lines and straps designed for this use. Allow for some movement in the plant for strong growth. Remove the stakes and lines after one growing season so you do not inhibit trunk development.
Mulching
 Add a 2”-3” layer of shredded mulch or chips around the plant. This will prevent water loss and keep mowers and trimmers from getting too close to the plant. Avoid overly deep mulch against the trunk or stem of the plant as this can promote disease or pest injury.
Planting Perennial & Annual Plants

Plant your plants around your planting area while still in their pots. Make sure you have taken into consideration the mature height of the plants as well as the sun or shade requirements. Determine an appropriate location for planting, then dig a hole2 times the width & 6”-8” deeper, replacing with enriched soil (compact this 6”-8” of soil) Add a generous amount of Bumper Crop to enrich the soil. Blend into the soil.
For Successful Planting
 Bumper Crop
An all-organic soil builder with high organic nutrient content and endo- and ecto-mycorrhizal fungi.
Master Start
A fertilizer for all new plantings of sod or seeded lawns, shrubs, ground covers, flowers, or bare root plantings. Provides the right nutrient mix to develop a sturdy root system and strong top growth.
Root Master B1
Formulated to reduce plant shock and improve resistance to stress. Improves water and nutrient uptake.
Planting Bulbs In The Winter
Plant bulbs are generally planted in the fall or spring, but in reality, they can be planted anytime so long as you can physically dig a hole. There are many types of bulb plants, including lilies, hyacinths, daffodils and tulips, just to name a few. While each plant is different, you can generally plant them in the same manner, but you should always adhere to the planting instructions that come with your specific bulbs.
Step 1
Plant your bulbs in early winter if possible. You cannot plant bulbs while the ground is frozen, so if it is, place your bulbs in a thick plastic bag called a poly bag, which is available at your local home and garden store. Then store them in a cool, dark and dry place like your garage. However, plant them as soon as possible when you can successfully dig some holes.
Step 2
Plan to plant bulbs about three to six inches apart, depending on the type of bulbs. For instance, tulips and daffodils spread and grow quickly and should be planted about six inches apart, but crocuses and snowdrops should be planted only three inches apart
Step 3
Plan to cluster your bulbs together. You can even mix varieties. Place smaller growing plants in front and larger ones in the back.
Step 4
Dig holes that are about five inches deep for small bulbs and eight inches deep for large bulbs. The diameter of the hole should be twice as large as the bulb.
Step 5
Put the bulbs in the ground with the pointed end facing up. This is the end from which the sprout will emerge.
Step 6
Mix some compost or peat moss in with the soil you just dug up. Use that new soil mix to cover the bulbs. Pat the soil down with your hands to avoid any air pockets.
Step 7
Mulch over the area. A couple inches of mulch will help keep your bulbs in the ground warm until spring when you may see the green sprouts begin to emerge and then bloom soon thereafter. If not, they should bloom the next season.
Mother’s Day Savings!
MAKE MOM FEEL SPECIAL THIS WEEKEND! SHOP OUR EXTENSIVE SELECTION OF HANGING BASKETS, ANNUALS, PERENNIALS, INDOOR PLANTS AND POTTERY!

Mother’s Day is just around the corner this Sunday, May 8, and nothing says, “You’re the best,” quite like a living, breathing reminder of all the life and love mothers pour into our hearts. Plant gifts serve as a symbol of growing love, appreciation and gratitude for the number one lady in all of our lives.
From tropical foliage to traditional blooms, capture all you want to say with a lovely indoor plant for mom to centrally display as a reminder of how much you care. Show her how amazing she is with a Mother’s Day plant to brighten her day. After all, she’s always been there to put some extra sunshine in your step – go ahead and return the favor.
SAVE $5 OFF ANY $30 PURCHASE
What to do during a drought
WHAT TO DO DURING A DROUGHT
- Spray Trees & Shrubs With An Anti-Transpirant
If pruning, only remove dead material from trees and shrubs, anything more will encourage new growth. This takes energy that a drought stressed plant cannot afford. Instead, spray leaves with an anti-transpirant or anti-dessicant to help leaves retain what moisture they have.
- Water Early
Morning temperatures are cooler and the sun is not as intense as later in the day so there is less moisture loss due to evaporation.
Also, water sitting on foliage will have a chance to dry during the day minimizing the chance of fungal infection, especially during humid weather.
- Water Slowly & Deeply
Watering slowly will allow the moisture to penetrate more deeply into the root zone rather than running off the soil surface. Create depressions or water traps around larger plants to hold the water where you want it until it can saturate the soil. Remember to water trees at the drip line, not at the trunk base, as this is where the roots are most active. Drip irrigation bags are excellent for watering newly planted trees.
- Water the Soil, Not the Leaves
Plants take up water through their roots. Water landing on the foliage will be lost due to evaporation. The more water you direct to the soil, the less you will waste. The key is infrequent, but heavy watering rather than light, frequent waterings. This encourages deep root growth, which increases drought tolerance.
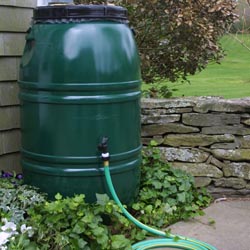
- Conserve Precious Water
Place a rain barrel under downspouts to collect rainwater. Wash the car on the lawn rather than on the driveway. Reuse ‘gray water’, such as bathtub or dishwater and rinse cycle water from your laundry, to water your garden. Replace leaky hoses and sprinklers and use washers to correct leaks at fittings.
PROTECTING OUR POLLINATORS
Every garden requires pollinators, and bees are among the finest. Without them there would be limited flowers and far fewer fruits and vegetables. Did you know that about 30% of the food we eat depends on the pollination of bees?
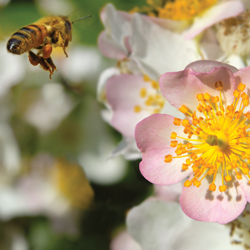
Although there are many bees that are great pollinators, like carpenter, mining, sweat and cellophane bees, some of the most well know and easily identified bees are the honey and bumble bee. Both of these bees live in social colonies and are cavity nesters. Because these bees are active all summer long, they require a constant supply of floral nectar close to their hive. Some of the biggest threats to the continued and healthy existence of these two bees are habitat loss, which causes inadequate nesting and scarce food supplies, and pesticide drift.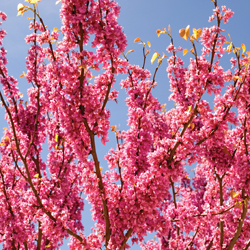
Bring more bees to your garden by planting a variety of native flowers that will bloom throughout the entire summer. Keep the bees in your garden by eliminating chemical use, especially while plants are in flower. Be kind to bees in your garden by providing a safe place for shelter and to lay their eggs. Make sure that there is an available water source for your bees. A birdbath works just fine.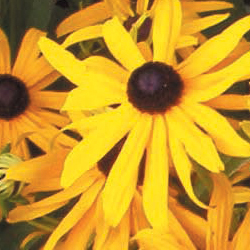
NATIVE PLANTS THAT ATTRACT BEES
Apple Malus
Aster Aster
Blackberry & Raspberry Rubis
Black-eyed Susan Rudbeckia
Blueberries Vaccinium
Currant Ribes
Elder Sambucus
Goldenrod Solidago
Highbush Cranberry Viburnum
Joe-pye weed Eupatorium
Lupine Lupinus
Penstemon Penstemon
Purple coneflower Echinacea
Redbud Cercis
Rhododendron Rhododendron
Sage Salvia
Stonecrop Sedum
Sunflower Helianthus
Willow Salix