

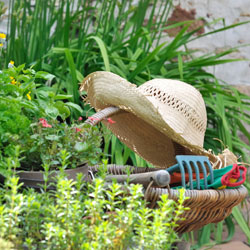
Tips for a Gardening Gift Basket
Tips for a Gardening Gift Basket
A gift basket is a great present for any gardener in your life, and is easy to customize to any gardening preferences. With just one trip to the garden center, you can create the perfect gardening gift basket for any special occasion.
When to Give a Gardening Gift Basket
A gift basket can be a wonderful choice for any special occasion, including birthdays, anniversaries or holidays. A gardening gift basket is especially thoughtful for someone who is interested in starting gardening as a new hobby, perhaps after retirement or buying a new home where they finally have gardening space. Anyone starting a clean eating or clean living lifestyle may also appreciate getting started gardening so they can better control their own food sources.
Creating the Very Best Gardening Gift Basket
There are many great ways to vary a gift basket to match the recipient’s gardening preferences exactly. Being flexible also allows for creativity in assembling the basket and making it a fun, enjoyable gift. To create a practical, customized gardening gift basket, it is important to consider all the necessary parts, including…
- Basket
A wicker or woven basket is the traditional choice for building a gift basket, but when you’re making a gardening basket, you can think of more creative containers instead. For a small basket, consider using a galvanized bucket, watering can, bird bath, window box or other creative option. Larger gift baskets can start with a large planting pot or similar container, or even something as practical as a wheelbarrow. - Base
Filling the bottom of a basket provides a sturdy base to support gifts, as well as to be sure the basket does not tip over when it is filled. For a gardening gift basket, good options for a firm base include a bag of potting soil or fertilizer, mulch, peat moss or other gardening goodies. A bag of birdseed or river rock can also be an exceptional base. Even a large hose can help fill the bottom of a container and will be another great gift. - Gifts
The bulk of the basket should be the different gifts that match the recipient’s gardening dreams. For a flower gardener, for example, that may include bulbs and seedlings of their favorite blooms, as well as flower pruning shears and other hand tools. A vegetable garden gift basket, on the other hand, would have different veggie seedlings, plant identifiers and perhaps some long-handled tools for working in the garden. A bee house can be a great addition for any type of garden to encourage more pollinators, and a garden hat, new gloves and how-to books are all good choices for any gardening-themed gift basket. Of course, a gift card will always make a perfect addition to any gift basket allowing the recipient to make a few choices of their own. - Decadent Extras
To make a gift basket extra special, be sure to add some luxuriously decadent gifts. These might be purely decorative items or artisanal extras, and can really add character and thoughtfulness to your gift basket. Wind chimes, welcome flags and gnomes or other whimsical pieces are great options, or choose items such as candles, soap, lotion bars, honey or other treats available from local artisans. - Fillers
A good gift basket will be lush and full of fun gifts, and you can easily fill in small bare spots in a gardening gift basket with a range of smaller, inexpensive gifts. Packets of seeds, vine ties, plant food, pot casters, or even a hose nozzle are just a few fun options that can really fill out a gardening gift basket. For colorful fillers, consider adding potted flowers or floral starts for blooms to serve as bows.
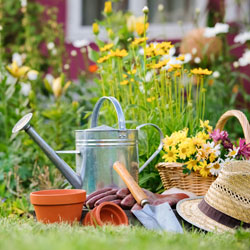
Finishing Touches
Once your basket is filled, it’s time to make it look more like a celebratory gift. Choose a card to include as a greeting, and wrap the lip of the basket with ribbon, twine or raffia to draw the gift together. Smaller baskets may even be entirely wrapped with cellophane or tissue so they can be opened for a fun surprise. Burlap can be another option for a rustic but still practical covering or wrap that can be used in the garden to cover delicate plants after the gift is opened.
A gardening gift basket can be an amazing way to celebrate any special occasion or friendship. By choosing gifts carefully and coordinating the basket to the recipient’s gardening wishes, the gift is sure to be a wonderful surprise that is happily appreciated every time the recipient steps into their garden.

Holiday Poinsettia Care
A poinsettia plant is the quintessential holiday decoration and hostess gift for holiday parties or visits. They’re great as a centerpiece, decorating a step or filling in any empty space with bold holiday color and cheer. You can even position multiple poinsettias into elaborate arrangements mimicking trees or other holiday shapes. Have a look at our poinsettia do’s and don’ts list to help keep your poinsettia lush and beautiful through the holidays and beyond.
- DO place your plant in indirect sunlight for at least six hours per day. If direct sun can’t be avoided, diffuse the light with a shade or sheer curtain to prevent burns that can discolor the bracts or dry the plant out too quickly.
- DO provide room temperatures between 68-70° Fahrenheit. Generally, if you are comfortable, so is your poinsettia. Cooler (but not cold!) temperatures will be better than hotter areas, but you must avoid sudden chills.
- DO water your plant when the soil feels dry to the touch. Use distilled water without any chemicals or additives. If you must use tap water, allow it to stand for 24 hours before watering so chemicals can evaporate out of the water.
- DO fertilize your plant after the blooming season with a balanced, all-purpose fertilizer if you hope to keep the plant thriving for many weeks. Use fertilizer properly according to the manufacturer’s instructions.
- DON’T place plants near cold drafts or excessive heat. Avoid placing plants near appliances, fireplaces or air ducts, and minimize ceiling fan use or other drafts and breezes near the plant. Don’t place poinsettias near exterior doors that are opened and closed frequently.
- DON’T expose plants to temperatures below 50° Fahrenheit. Poinsettias are sensitive to cold, so do not place them outside during the winter months.
- DON’T overwater your plant or allow it to sit in standing water. Always remove a plant from any decorative container before watering so you can carefully gauge the water it receives, and allow any excess water to drain completely to minimize the risk of root rot.
- DON’T expose your plant to chilling winds when transporting it. Use the plant sleeve provided when you purchased the plant. If you will be giving the plant as a gift, wrap it lightly with tissue when transporting it.
- DON’T fertilize your plant when it is in bloom. After blooming, use the appropriate fertilizer and follow instructions carefully to provide your poinsettia with the proper nutrition.
- DON’T give up on your poinsettia! These plants can be stunning for many weeks after Christmas, and with proper care you can enjoy your poinsettia for long after the holiday season.

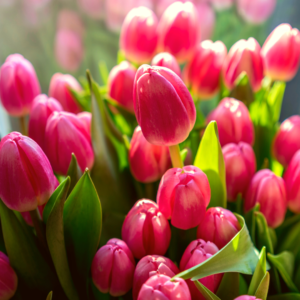
Tulip Time
It’s finally here, that time of year that we’ve all been anticipating – fall! And, you know what fall means? Tulip time!
The cooler days of fall entice us back into the garden that the August heat forced us to abandon. This is when your local Master Nursery® Garden Center is brimming with fresh, new, seasonal plant material and overflowing with fall-planted, spring-flowering bulbs. And, we wish to point out, that no bulb type is more treasured than the tulip. With an almost limitless selection (100 species and over 3000 varieties divided into 15 distinct groups), you’ll never tire of the tulip.
Tips for Planting Tulips
Tulips are an easy-care addition to any garden or landscape, and they are simpler to plant than many gardeners realize. Tulips need cold winters to stimulate blooms. They flower effortlessly and, in most cases, return for many years in USDA Hardiness Zones 3 – 7. Tulips may be grown in Zones 8 – 11 with a pre-chilling period of 10-14 weeks at 35 to 45°F. In these warmer climates, tulips are treated as annuals.
Tulip 10 Step
- Choose only top-sized, firm bulbs without bruises or obvious damage. Bigger bulbs generally indicate better quality and will provide more and larger flowers.
- Bulbs should be planted as soon as purchased, otherwise store them in a cool, dry location until ready to plant. Plant tulip bulbs before the ground freezes. When planting in Zones 8 – 11, store bulbs at 35 to 45°F until planting time.
- Choose a full or part sun location to plant tulips. A semi-shady location provides some relief from the heat in Zones 8 – 11.
- If planting a large number of bulbs, consider digging a free-form bed or trench in which to plant. Individual holes are appropriate when planting a small number of tulips.
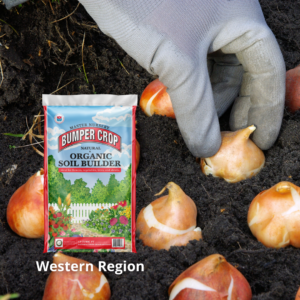
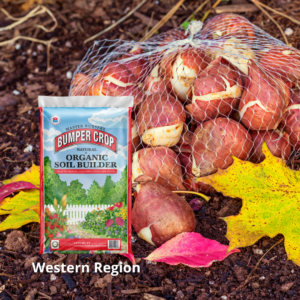
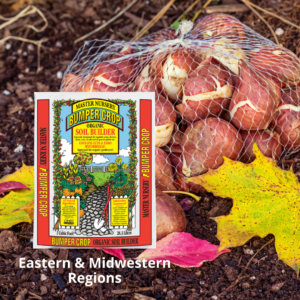
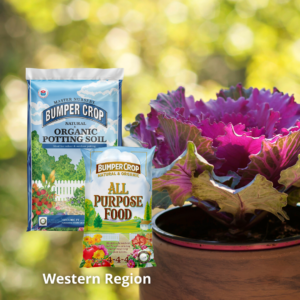
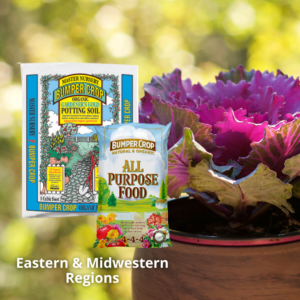
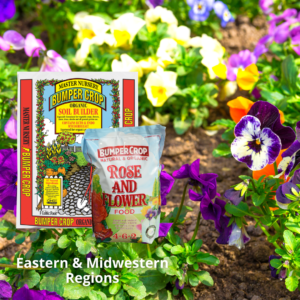
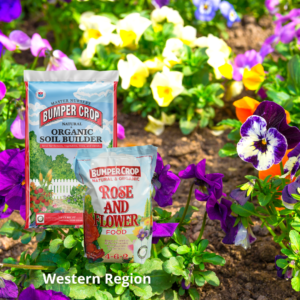
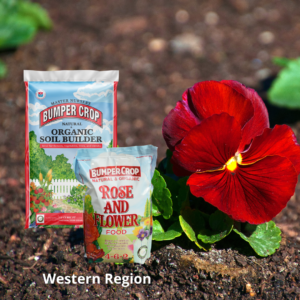
- Planting beds and holes should be well-draining and the soil enriched with plenty of Master Nursery® Bumper Crop® Soil Builder [Eastern & Midwestern Regions | Western Region].
- Plant tulips at the depth of three times the height of the bulb, approximately 6 inches deep.
- Always plant pointed end up.
- Apply a generous amount of bone meal at planting time.
- Backfill with the excavated, amended soil.
- Water the planting area thoroughly and mulch generously after planting tulip bulbs.
Tried & True Tulip Selections
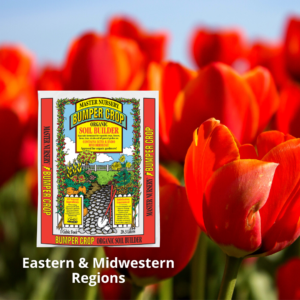
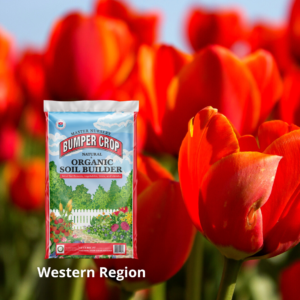
Some tulips can be a little finicky, and while these may disappear from your garden after a year or two, other selections promise trouble-free blooms for years to come if planted and cared for correctly. Proper bulb planting starts with amending your soil with Master Nursery® Bumper Crop® Soil Builder [Eastern & Midwestern Regions | Western Region] to ensure a healthy and nutritious planting environment with excellent drainage.
Species Tulips
Species Tulips are by far the longest-lived tulips and will even naturalize when given advantageous growing conditions. Small in stature, species tulips are an excellent choice for rock gardens and for planting in the front of beds and borders.
Darwin Hybrids
Darwin Hybrids perennialize quite well and are valued for their long-stemmed and large brightly colored flowers available in a wide range of hues. These mid-season bloomers make excellent cut flowers.
Emperor Tulips
Emperors are also good perennializing tulips. These modern hybrids are known for their substantial, elongated blooms borne on tall stems. Some even boast decoratively patterned and mottled foliage.
The temps are cooler, the garden is waiting, and your local Master Nursery® Garden Center is ready for you. So, what are you waiting for? Take advantage of tulip time and prepare for a bright and floriferous spring!
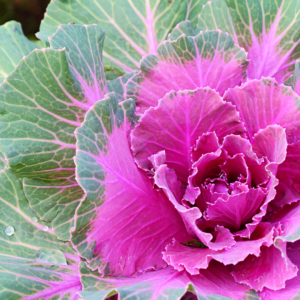
Ornamental Cabbage & Kale
Looking to add extra appeal to the fall and winter landscape? This year, try ornamental cabbage and kale! Planted alongside chrysanthemums and winter pansies, ornamental cabbage and kale add distinctive bold texture and vibrant seasonal color to the late-season landscape.
Foliage Not Flower
Frequently called ‘flowering’ cabbage & kale, these fall favorites are not flowers at all, but large, dense rosettes of colorful, frilly foliage richly variegated with cream, white, green, pink, rose, and purple – the perfect fall palette.
- Kale leaves are frilly-edged and sometimes deeply cut or lobed.
- Cabbage leaves tend to have a smoother appearance with a wavy leaf edge.
While the typical large ornamental cabbage and kale varieties are readily available at this time of year, you can also try more unusual options, including dwarf varieties suitable for planters, and upright, tall, long-stemmed varieties that are useful in fall floral arrangements.
Unlike most other fall ornamentals, these cold-tolerant annuals improve in appearance after a frost or two, bringing out more intense and brilliant colors in their foliage – perfect for use as both an autumn accent plant mixed with other fall favorites or as a specimen plant, commanding all the attention. Initially select your ornamental cabbage and kale for the leaf texture as the true leaf color will not be recognized until after temperatures have cooled down quite a bit.
Our favorite tried and true varieties include:
Cabbages
- Color Up
Grows upright with green leaves surrounding a center of white, pink, or magenta.
- Osaka Cabbage
A compact plant with large, smooth, wavy leaves boasting a center of white, pink, or jewel-toned purple.
Kales
- Crane
When grown close together, Crane is a tall variety, perfect for cutting and using in floral arrangements
- Peacock
This extra fancy variety sports deeply cut, frilly, loose leaves in purple, magenta, and white.
Planting
Popular in fall borders, grouped in planting drifts, or planted in containers for the deck or patio, ornamental cabbage and kale typically grow to 12-18” high and wide, depending on the cultivar. Plant these fall jewels in September and early October, at least 12” apart, depending on the variety, in an area with full sun that has rich, moist, well-drained soil.
- In Ground
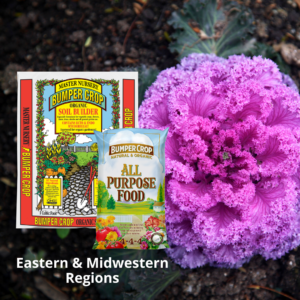
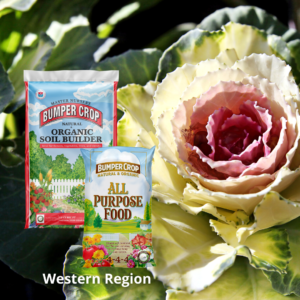
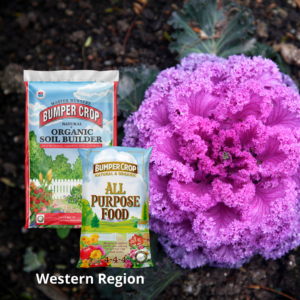
If planting in the ground, add a shovel full of Master Nursery® Bumper Crop® Soil Builder [Eastern & Midwestern Regions | Western Region] to each planting hole to enrich the native soil. Also, sprinkle in a small handful of Master Nursery® Bumper Crop® All Purpose Food to help your plants thrive through the fall, winter, and into spring.
- In Containers
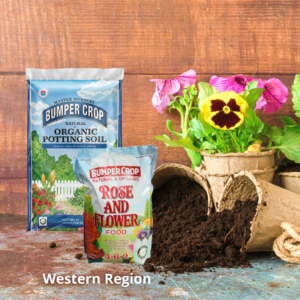
When planting in pots, planters, urns, and window boxes, it is best to plant using lightweight, nutritious potting soil. Of course, we recommend Master Nursery® Bumper Crop® Potting Soil [Eastern & Midwestern Regions | Western Region] along with a sprinkling of Master Nursery® Bumper Crop® All Purpose Food for happy, healthy plants all season long.
Cabbage and Kale Tip
While these plants are quite similar to the cabbage and kale cooked in the kitchen and consumed in salads, soups, and stews, it is important to note that ornamental varieties are cultivated for color and shape rather than taste. If you’d like to use them in the kitchen, use them as a garnish only. They are more attractive than tasty, and their proper place is in the garden.
Enjoy your ornamental cabbage and kale during the cold months of the year as once they begin to bolt in the spring, sending up their flower stalks, it is time to pull them up and replace them with late spring and summer flowering annuals. This fall, however, try several new varieties planted in both containers and directly into the garden. You’ll love the long-lasting color that they’ll bring to your surroundings.

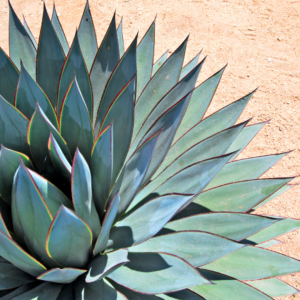
Growing Agave
Native to the Americas, dramatic Agave is the perfect companion for the California landscape. Along with its striking leaves and architectural form, Agave is astonishingly drought tolerant and fire-resistant, important qualities for west coast landscape plants.
About Agave
Although leaf shape and color may vary, Agave leaves always radiate from a central point in a symmetrical rosette. The leaves are succulent and, most often, pointy at the tip. Some varieties have smooth leaves while others possess leaves with teethed margins. Leaf color can range from deep green to bluish green to silvery blue to gray. Some varieties offer variegated leaves with yellow or white lines or edges. Agave is also available in a wide-ranging assortment of sizes from impressively enormous to dainty and small.
Grown primarily for its distinguished appearance, Agave does flower. The flower stalks tend to be imposing compared to the overall size of the plant, and it may take years, even decades, for an Agave to bloom. Flowers may be branched, similar to a tree, or unbranched. The flowers will form seed pods or bulbils, necessary for reproducing the plants. Once an Agave flowers, the main plant will die. But the plant leaves behind clones for propagating new Agaves. You may prevent Agave from flowering by cutting off the flower stalk as it begins to form. Agave flowers are an important source of nectar for pollinators such as hummingbirds and bees.
Growing Agave
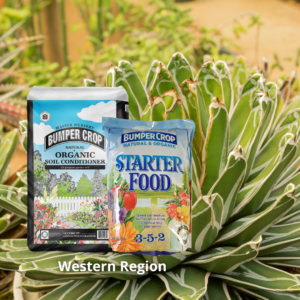
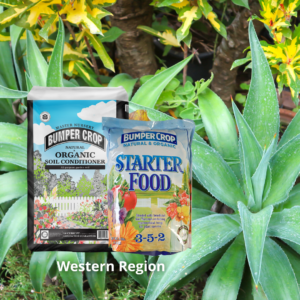
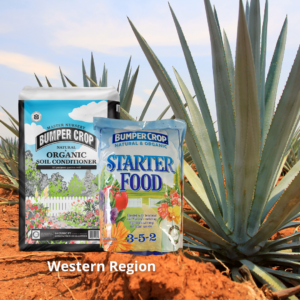
Whether grown as a specimen or grouped in drifts in the landscape, Agave requires a full sun site – direct sun – and prefers a low humidity environment. Poor soil is not a problem, and Agave can tolerate nutrient deficient soil quite well once established. Give your Agave a good start by amending the native soil with Bumper Crop® Natural & Organic Soil Conditioner. This will help increase drainage, as sharp drainage is essential. Adding gravel or chicken grit to the planting area is also helpful. Fertilize lightly with Bumper Crop® Natural & Organic Starter Food. Although succulent, and therefore drought tolerant, watering of Agave is infrequent but occasionally necessary, more so for potted plants than those in the ground.
Types of Agaves
With Agave, there seems to be an unlimited selection of colors, shapes, forms, and sizes. Stop by your local Master Nursery® Garden Center to sample their offerings.
With so very many Agaves to choose from, it is hard to select our favorite varieties. But here we go…
- American Century Agave
Its large size, 6 to 12 feet high, and narrow, long, wavy leaves make this an irresistible Agave for the west coast landscape. With desirable blue-green foliage, this Agave is exceptionally winter hardy to the low teens.
- Blue Agave
Blue Agave is where tequila comes from. As the name implies, this Agave has beautiful blue foliage, and it can grow an impressive 8 feet high by 8 feet wide.
- Mountain Agave
This lovely, apple-green agave with reddish-brown teeth grows up to 4 feet tall and 5 feet wide. Mountain Agave prefers full sun but will tolerate a part shade location and will grow best in soil that is well-drained, rich in organic matter, and regularly irrigated.
- Queen Victoria Agave
A most beloved dark-green, toothless Agave of manageable size, about 18 inches in diameter. The leaves sport attractive white markings on their sides and have a spike at their tip.
- Fox Tail Agave
A lovely, slow-growing Agave that will eventually grow to 4 feet high and looks like a blossoming flower with graceful, undulating, silvery-green leaves. The leaves have no teeth or terminal spine, making this Agave a dream to plant and care for. This Agave will tolerate moist or dry, well-drained soil.
Astonishing, dramatic, colorful, easy-care Agave will make a spectacular statement in your dry west coast garden. Have fun experimenting with new and exciting varieties.
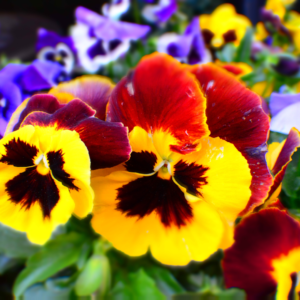
Colorful Winter Pansies
Don’t let their subtle size fool you; winter pansies are tough, cool-weather plants that bloom for six or more consecutive months, from the beginning of fall until the end of spring, adding much-needed color to an otherwise stark winter landscape.
Places to Plant
Pansies bloom in an array of colors to suit every taste. Often the petals are multi-colored with curious splotches, blotches, and markings that add a touch of whimsicality to the garden.
Versatile pansy blossoms may be used to brighten most areas of the winter garden. Adding a graceful drift of lively pansies to the front of an often-viewed bed or border will reinvigorate the winter landscape. Plant pansies under a tree, along a fence or pathway, and atop a stone wall to bring the dainty yet unusual flowers closer to the eye. Try tucking pansy plants into garden beds around spent perennials and shrubs. They are sure to brighten up a lackluster section of the garden landscape. Plant pansies anywhere that you will have occasion to enjoy their beauty and color all through the coldest months of the year.
Guess what? Winter pansies perform well in containers too! Mix them with dwarf shrubs or semi-evergreen perennials in planters placed on a deck, patio, or next to the front door to greet your guests with their array of welcoming hues. Or you may simply stuff a window box or hanging basket full of pansies to create an explosion of color.
Pretty Pansies
There is little difference between the pansies labeled as “winter” pansies and those labeled “spring” pansies. Pansy varieties sold in the autumn, however, are bred to be the most cold-tolerant and should be planted early in the fall to give them time to establish strong roots and shoots before a hard frost hits. When fall-planted, pansy plants are larger, more robust, and floriferous come spring than those planted in the springtime.
There are numerous varieties of gorgeous winter pansies available in the fall; some popular ones are:
- Matrix Series
This series of winter pansies come in an assortment of colors that range from solid- to multi-colored, and from no markings to pretty little faces on heart-shaped petals. These plants have excellent branching, able to support an abundance of blooms.
- Cool Wave Pansies
Super cold hardy, Cool Wave Pansies produce an abundance of colorful, medium-sized blooms on a vigorous spreading plant, making them the perfect choice for filling hanging baskets and planters or as a ground cover.
- Clear Mix Panola
Panola pansies are a cross between a pansy and violas, giving this series excellent cold hardiness, large flowers, and a high bloom count. These prolific bloomers are perfect for decorating beds, borders, and containers.
Practical Pansy Planting
Did you know that winter pansies, as with most annuals and perennials, perform their best if planted in soil that is rich in high-quality compost and fed with a well-balanced fertilizer that will promote blossoms?
- Ground Planting
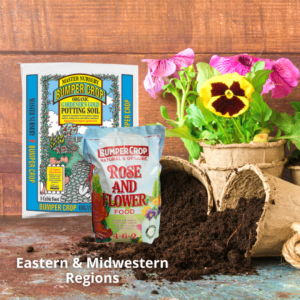
In the fall, choose a well-drained planting location in full sun, part sun, or part shade. Work in 4-6 inches of Master Nursery® Bumper Crop® Soil Builder [Eastern & Midwestern Regions | Western Region]. Plant pansies at the same level, or slightly higher, than they were growing in their market packs, taking care not to plant too deep or the plants may rot. Place plants about 4 – 6 inches apart. Apply Master Nursery® Bumper Crop® Rose and Flower Food after planting, mulch, and water the bed thoroughly. Remember to check the plants often during the first three weeks after planting, or until new growth begins, to ensure adequate moisture necessary for healthy development.
- Container Planting
When planting winter pansies in containers, the instructions are the same as when planting directly into the ground, except, it is better to use Master Nursery® Bumper Crop® Potting Soil [Eastern & Midwestern Regions | Western Region]. This lightweight, rich potting soil, loaded with compost, is the perfect soil for all container-grown plants. The soil in containers tends to dry out more quickly than soil in the ground. It is important to pay attention to container soil moisture levels in the fall as the winter pansies work to produce strong roots to sustain them through the cold months.
Pansy Maintenance
Minimal maintenance is necessary for winter pansies to reach their full potential.
Deadheading, removing spent blooms, is helpful as it stimulates the plant to produce abundant blossoms. Clipping out any dried foliage will keep pansy plants looking their best.
Whether scattered amongst the seasonal chrysanthemums and ornamental cabbage & kale or tucked into window boxes and containers, easy-care winter pansies add color and whimsy to the late-season landscape straight through to spring.

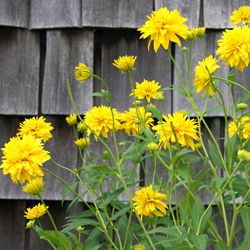
Audition Some Autumn Bloomers
Extend the beauty of your garden with vivid autumn-blooming perennials. When you think of fall-blooming plants, don’t stop at mums – there are many perennials that can add color to your yard at this time of year.
Top Autumn Bloomers
While there are different autumn-blooming perennials for different growing zones and climate conditions, some of the most popular and widespread options include…
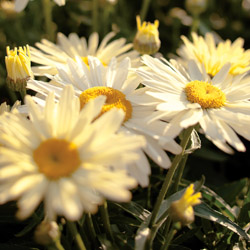
- Fall Daisies
For fall daisies (besides daisy mums!) grow Boltonia or Nippon Daisy. Boltonia is a tall (3-4′) grower, suitable as a background plant. White or pink daisies are borne in profusion atop fine grey-green foliage. The Nippon Daisy (Chrysanthemum nipponicum) is covered with large crisp white daisies in October. Both love lots of sun and make excellent cut flowers. - Autumn Sedums
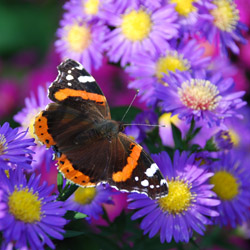
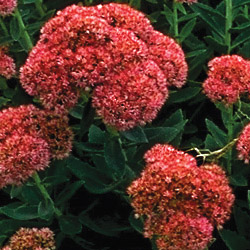
Bold-foliaged sedums provide texture as well as color in a sunny place. Sedum ‘Autumn Joy’ is the most well known. It has coppery-pink flower heads. Sedums ‘Brilliant’ and ‘Stardust’, with soft pink and white flowers respectively, are also attractive. For a totally different color combination plant sedum ‘Vera Jameson’. It has gray-purple foliage with rose pink blooms and looks stunning when planted with Blue Fescue, Artemesia Silver Mound and other silver-foliaged plants. As an added bonus, all the sedums are attractive to butterflies. - Autumn Asters
Asters are another fall bloomer that butterflies love. These perennials like sun and moist, well-drained soil. There are many colorful aster varieties in shades of pink, purple, blue and white. Some favorites include tall-growing aster ‘Alma Potschke’ with bright pink flowers, blue-flowered aster ‘Professor Kippenburg’ and low-growing aster ‘Purple Dome’ with its deep purple blooms. - Autumn Goldenrod
Sunny yellow goldenrod (Solidago) is another bright addition to the fall garden. Wrongly blamed as the cause of fall allergy problems, goldenrod has rightly taken its place in the fall garden. It looks particularly effective combined with blue flowering plumbago, purple asters and ornamental grasses.
Fall Bloomers for Shade Gardens
Even shade gardeners can enjoy late blooming perennials. Tall growing Japanese Anemones are a stately addition to the perennial garden. Bloom colors range from pure white to various shades of pink, and flowers can be single, semi-double or double blooms. Anemones grow well in light to moderate shade and spread quickly to form large clumps, filling in space vacated by spent summer plants. Turtlehead (Chelone) is another fast spreader for shade. Rose pink flowers cover the tops of the plant from early September to October. For a deeply shaded location, try Toad Lily (Tricyrtis), which has clusters of beautiful cream flowers, spotted with maroon along its upright stems. For light shade, plant Blue Cardinal Flower (Lobelia siphilitica), whose intense blue spikes can be admired from mid-August until frost.
No matter what type of garden you have, the end of summer does not need to mean the end of colorful blooms. Instead, just opt for amazing fall bloomers and enjoy brilliant color even longer!
Summer Watering Tips
As the days heat up, watering can become a dreaded garden chore and too many gardeners use wasteful techniques that use plenty of water but don’t give their plants the moisture they really need. Make watering plants easier and more efficient with the proper practices and tools…
- Mulches not only make plantings look more attractive, but their most important functions are to help retain soil moisture and minimize weeds, which would also usurp moisture from your plants. Mulch around plants to a depth of 2-4 inches, refreshing mulch as needed to maintain that depth and attractiveness.
- Watering cans and small containers work great for spot watering plants with different watering needs by hand. You don’t always need to get out a hose or sprinkler to get the watering done.
- Check to make sure that you have the proper length hose(s) to reach every corner of your garden. Take into account any obstacles in the way, and be sure you aren’t dragging the hose over any delicate plantings to reach more distant dry spots.
- Add a water wand to the hose to get the water where it’s most needed – the base of the plants – without needing to bend over repeatedly, which can cause back strain.
- The best time to water is during the early morning hours of a sunny day. This will allow plants to absorb more water before it evaporates when temperatures rise, but won’t leave water to sit on plants overnight when mold can develop.
- Always water plants and container gardens thoroughly and deeply to encourage deeper, more drought-tolerant root systems. It is better to water less frequently but more deeply rather than more often but with less water.
- In the landscape, a good rule of thumb is to provide an inch of water per week minimum. Keep track of precipitation with a rain gauge to avoid wasting water by overwatering when Mother Nature does the job.
- New individual plants that are set out, direct sown seed beds, sodding, etc. often require daily care, including watering, until established. Check moisture levels carefully during this period so the plants are well cared for.
- Use soaker hoses to provide slow drip watering. This allows plants to absorb water easily without wasting water by evaporating from foliage or spraying into the air. Soaker hoses can even be layered beneath mulch to preserve as much moisture as possible.
- Pay extra attention to plants in containers and hanging baskets as they tend to dry out faster and with greater frequency. These plantings will likely need to be watered daily or even multiple times a day during heat waves.
- Place Tree Gators, a drip irrigation bag, on newly planted trees for slow, steady watering that will soak down to the root system without draining away along the surface of the soil.
If you’ll be away on an extended vacation, or even just for a few days, make arrangements with a trusted friend or neighbor to “plant sit” while you are gone. There’s nothing worse than worrying about your garden while you’re away – except coming home to crisp plants that haven’t been watered properly!
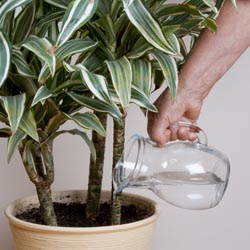

Watering When Away
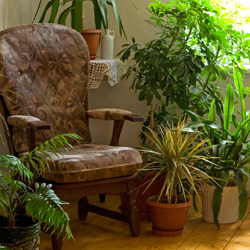 It’s vacation time! You’re going to be gone for two weeks or more, your friends, neighbors and family members are all busy and the weatherman says it’s going to be “hot, hot, hot.” What about your houseplants?
Fear not! A few minutes of thoughtful planning and a quick trip to the garden center will ensure meeting your plants’ watering requirements even when you can’t be home for daily moisture checks. Popular and effective solutions include…
- Pre-Watering: Before you leave on your trip, make sure your plants are well-watered. Many houseplants can withstand some watering neglect, and if you aren’t gone too long, they may not need any supplemental solutions if you’re watered them right before your trip. Take care not to overwater, however, or you could be compounding the problem.
- Anti-Drought Solution: Prior to leaving, water with an anti-drought solution. It temporarily forces the plant into dormancy. This reduces the water requirement for roughly two weeks (effective control will vary by product and plant type) while the solution gradually wears off. This can affect blooming or growth periods, however, so read instructions carefully and use the solution exactly as directed.
- Self-Watering Containers: Planting your houseplants in self-watering pots is truly looking ahead. A reservoir holds water under the pot, and this water gradually travels to the soil via a wick, always keeping the soil moist so long as the reservoir contains water. If you want to use a specific pot without a built-in reservoir, use a conversion kit. Various sizes are available and some use fill tubes. Consider adding liquid fertilizer to the reservoir water to ensure your plant gets proper nutrition while you are away.
- Individual Pot Drippers: These generally hold water above the plant. Various sizes and styles provide water to small and large pots. From beautiful blown glass globes to simple plastic bottles, these allow water to drip down into the soil through a drip-tip inserted in the soil. One style even looks like a flask attached to the side of the pot with a tube dripping water to the soil. Because they show above the plant, many people only use them during their vacation.
- Automatic Watering Systems: These are more elaborate but very effective options. A large water reservoir feeds to clustered houseplants through small tubing attached to drippers inserted in the soil. Larger pots use two or more drippers. These systems pump water on a regular basis using a battery and timer, making them ideal for regular watering when you may be taking a longer trip. These also allow liquid fertilizer in the reservoir so your plants are properly nourished.
Go ahead and enjoy your trip…your plants should be fine!
Long-Blooming Perennials for Summer

 By choosing long-blooming perennial plants, you can capitalize on the best of both worlds – plants that come back from growing season to growing season, and those that bloom for an extended length of time. This also means you’ll have more time to appreciate the gardens you create!
Here is just a sampling of long-blooming perennial plants perfect for the sunny summer garden:
- Achillea (Yarrow) is a very drought and heat resistant plant once established. The flower heads are long-lasting and many colors are available including yellow, gold, pink and pastels in apricot, lilac, salmon, cream and white. Plants grow from 8-36″ tall, depending on variety. The flat-topped flower heads grow up to several inches across, and make excellent cut and dried flowers. The fern-like, gray to gray-green foliage is somewhat aromatic and attractive even when the plant is not in bloom.
- Coreopsis (Tickseed) is one of the easiest and most rewarding garden flowers. The thread leaf varieties are usually the longest blooming, typically from June through fall. The pale yellow, bright yellow or rosy-pink daisy flowers smother the slender stems and thread-like leaves. Plant height, from 15-24″, is variety dependent. A mid-summer shearing of the seed heads will keep these plants blooming for many more weeks.
- Echinacea purpurea (Purple Coneflower) is a sturdy, bold-textured favorite with dark foliage that grows to 2-3′ tall and wide. The flowers are large, daisy-like with unique standings of dark-rose purple and lighter in color. Birds and butterflies also love these flowers, adding even more beauty to your garden with their visits.
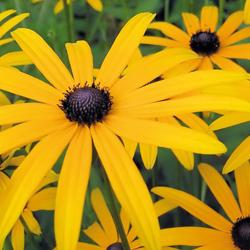
- Rudbeckia (Black-Eyed Susan) is an old-fashioned garden favorite. It is hardy, reliable, insect and disease-free and an exceptionally long-blooming plant – typically from July through fall. This medium-green, bold-foliaged plant grows to about 3′ tall and bears golden yellow, daisy-like flowers with dark brown centers. Both Echinacea and Rudbeckia flowers make excellent cut flowers and a wonderful place for butterflies to sit and eat.
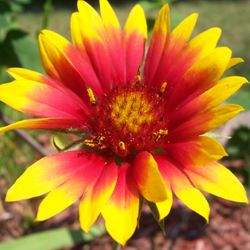
- Gallardia (Blanket Flower) is an American native plant which thrives in the hot sun and has beautiful yellow-orange flowers, marked with red. Height varies according to variety. Some favorites include “Baby Cole” which is a dwarf only 8″ high, “Goblin,” a 12-15” grower, and “Burgundy,” which reaches 18-24” and whose flowers are a gorgeous shade of burgundy red.
- Ceratostigma plumbaginoides (Plumbago) features intense blue flowers from mid-summer to September. Plumbago spreads quickly to form a neat groundcover and as an added bonus, leaves turn a brilliant red in the fall before dropping. This excellent perennial grows well in light shade also.
- Veronica (Speedwell) has neat, attractive foliage and abundant flowers in densely packed spikes. Look for the cultivars ‘Goodness Grows’ and taller ‘Sunny Border Blue’ for a beautiful addition of blue to your summer garden, and pair it with red or white favorites for a patriotic theme.
Remember, this is just a brief glimpse of the long-blooming perennials available to choose from. Stop by to see our wide selection of perennials so we can help you determine which plants are best suited to your garden.